
Monthly Creative Gift Challenge
JANUARY
What is the Monthly Creative Gifts Challenge:
I’m a trained artist and designer and I’ve been creating art since I can remember, but for so many years it’s become more of a job instead of being able to just create art just for fun. In some ways thats exactly why I started The Weekly Workshop. I am desperate to just make things I want to make. So I challenged myself this year to make creative gifts for the people in my life every month this year.
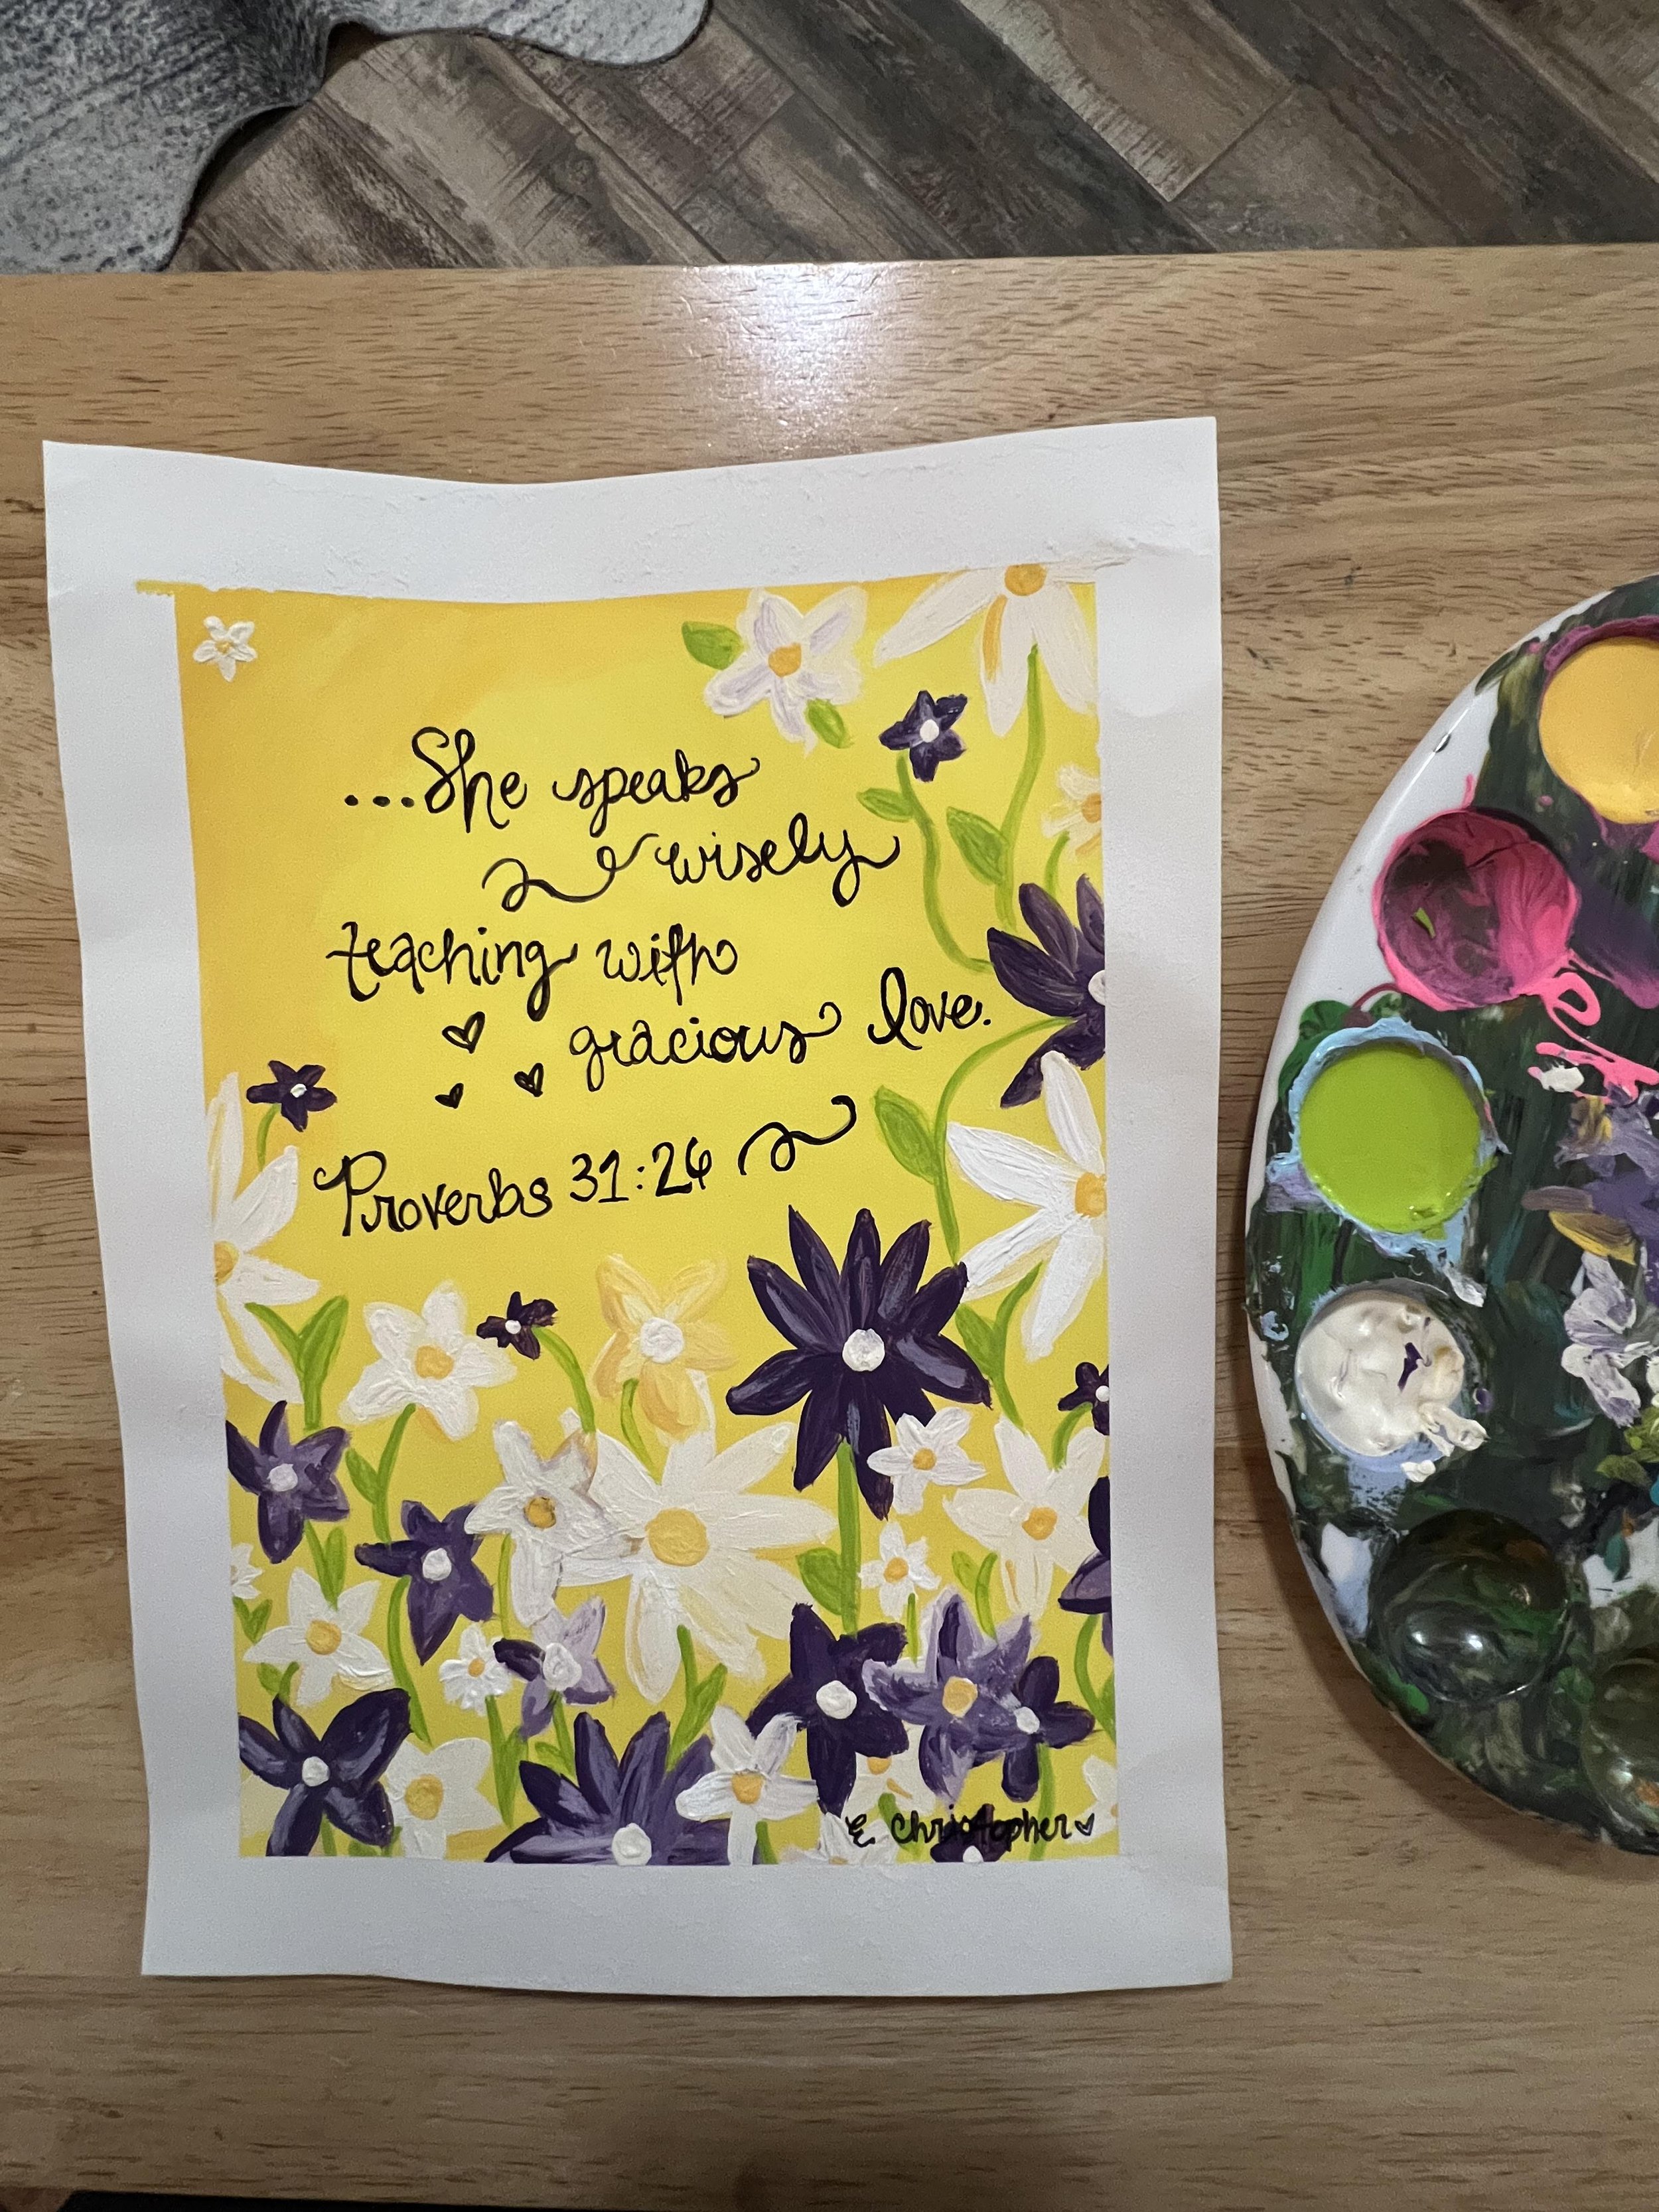
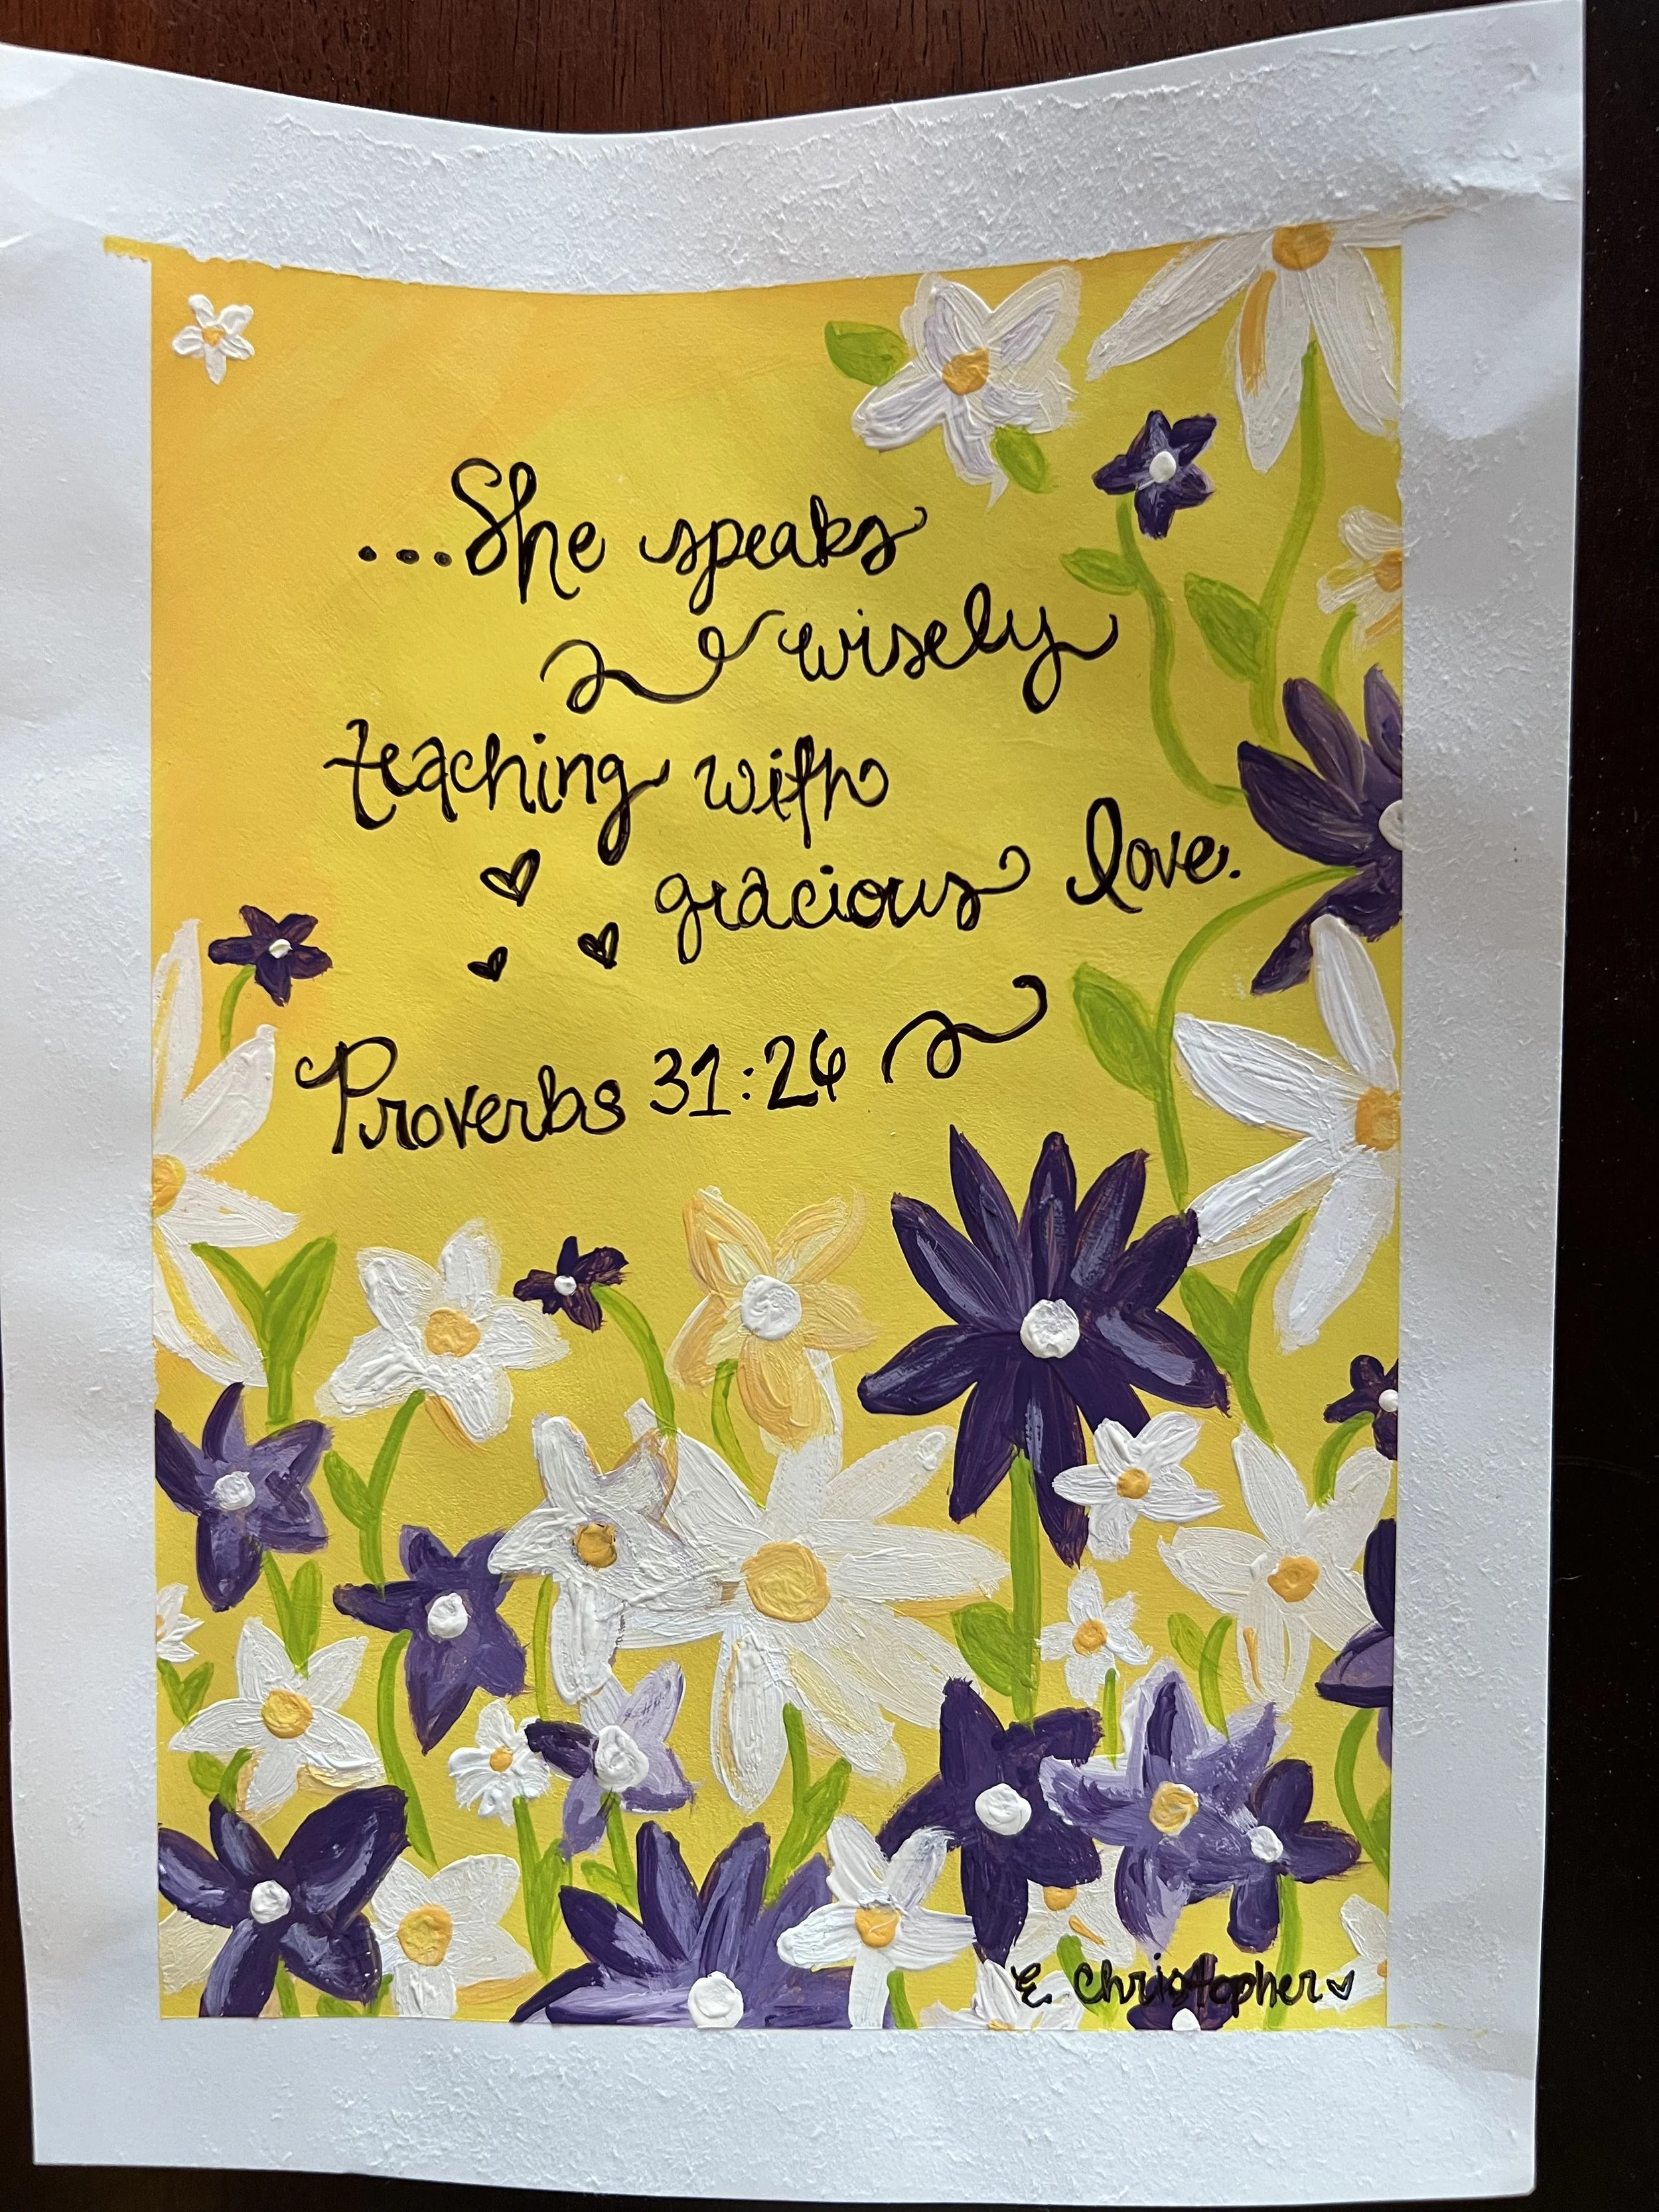
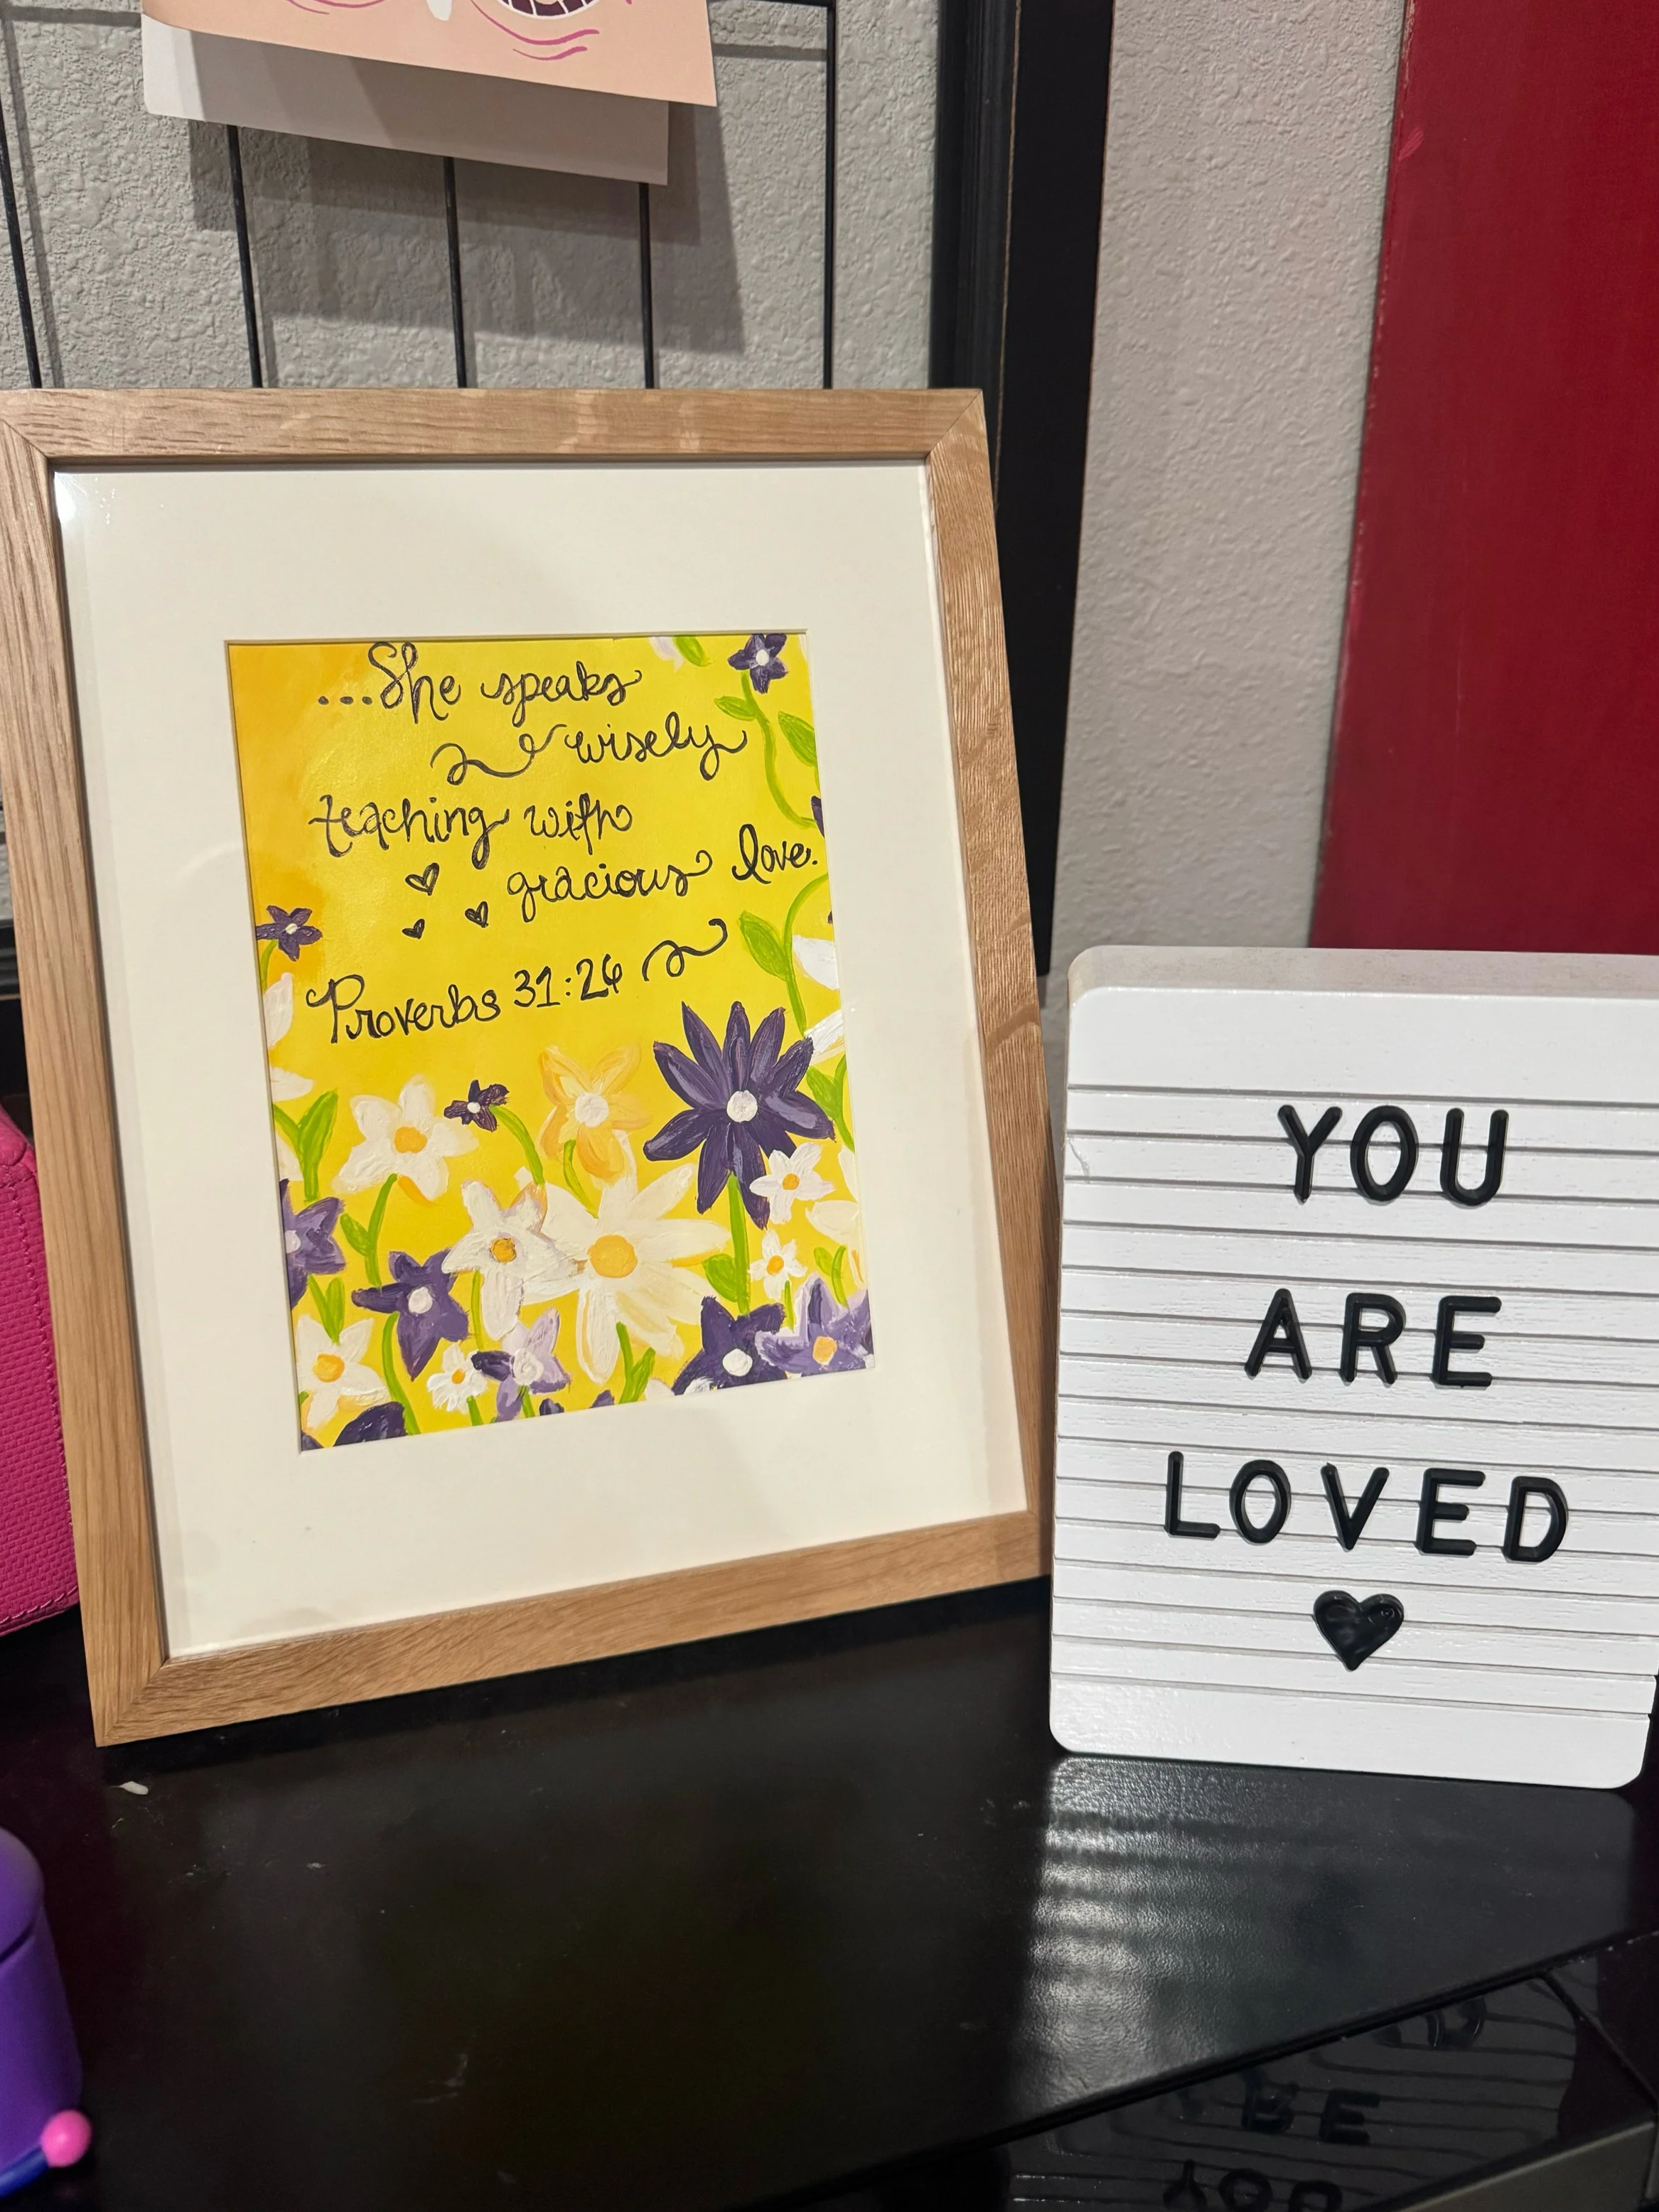
One of my kiddos Kindergarten Teachers had a birthday in January and I knew she had to be first on my list of monthly creative gifts. She is the kindest, most loving, smart, thoughtful and patient teachers and we have been so blessed by her. When trying to decide what to make her I first looked on the “Favorite Things” page that the teachers fill out at the beginning of the year. I had a feeling I wanted to do a painting because I’ve been trying to paint as much as I can this year and I thought it would be something that she could keep for years to come. When looking at her sheet I saw that her favorite colors were purple and yellow and so I tried to lean into making something pretty with those colors. I’ve been seeing a lot of inspiring floral paintings lately and I figured if it was going to be for her classroom that might be something bright and cheery that the students might enjoy looking at. I then looked for a bible verse that really sums up who she is and what she means to my kid. I found Proverbs 31:26 and I knew it would be perfect. I used Acrylic paint and this took me one evening to work on. If you are thinking about making a simple painting for someone in your life and don’t know where to start here are some steps.
Step 1: Decide who you want to make a painting for. Complete a brain dump of all of their favorite things, colors, likes.
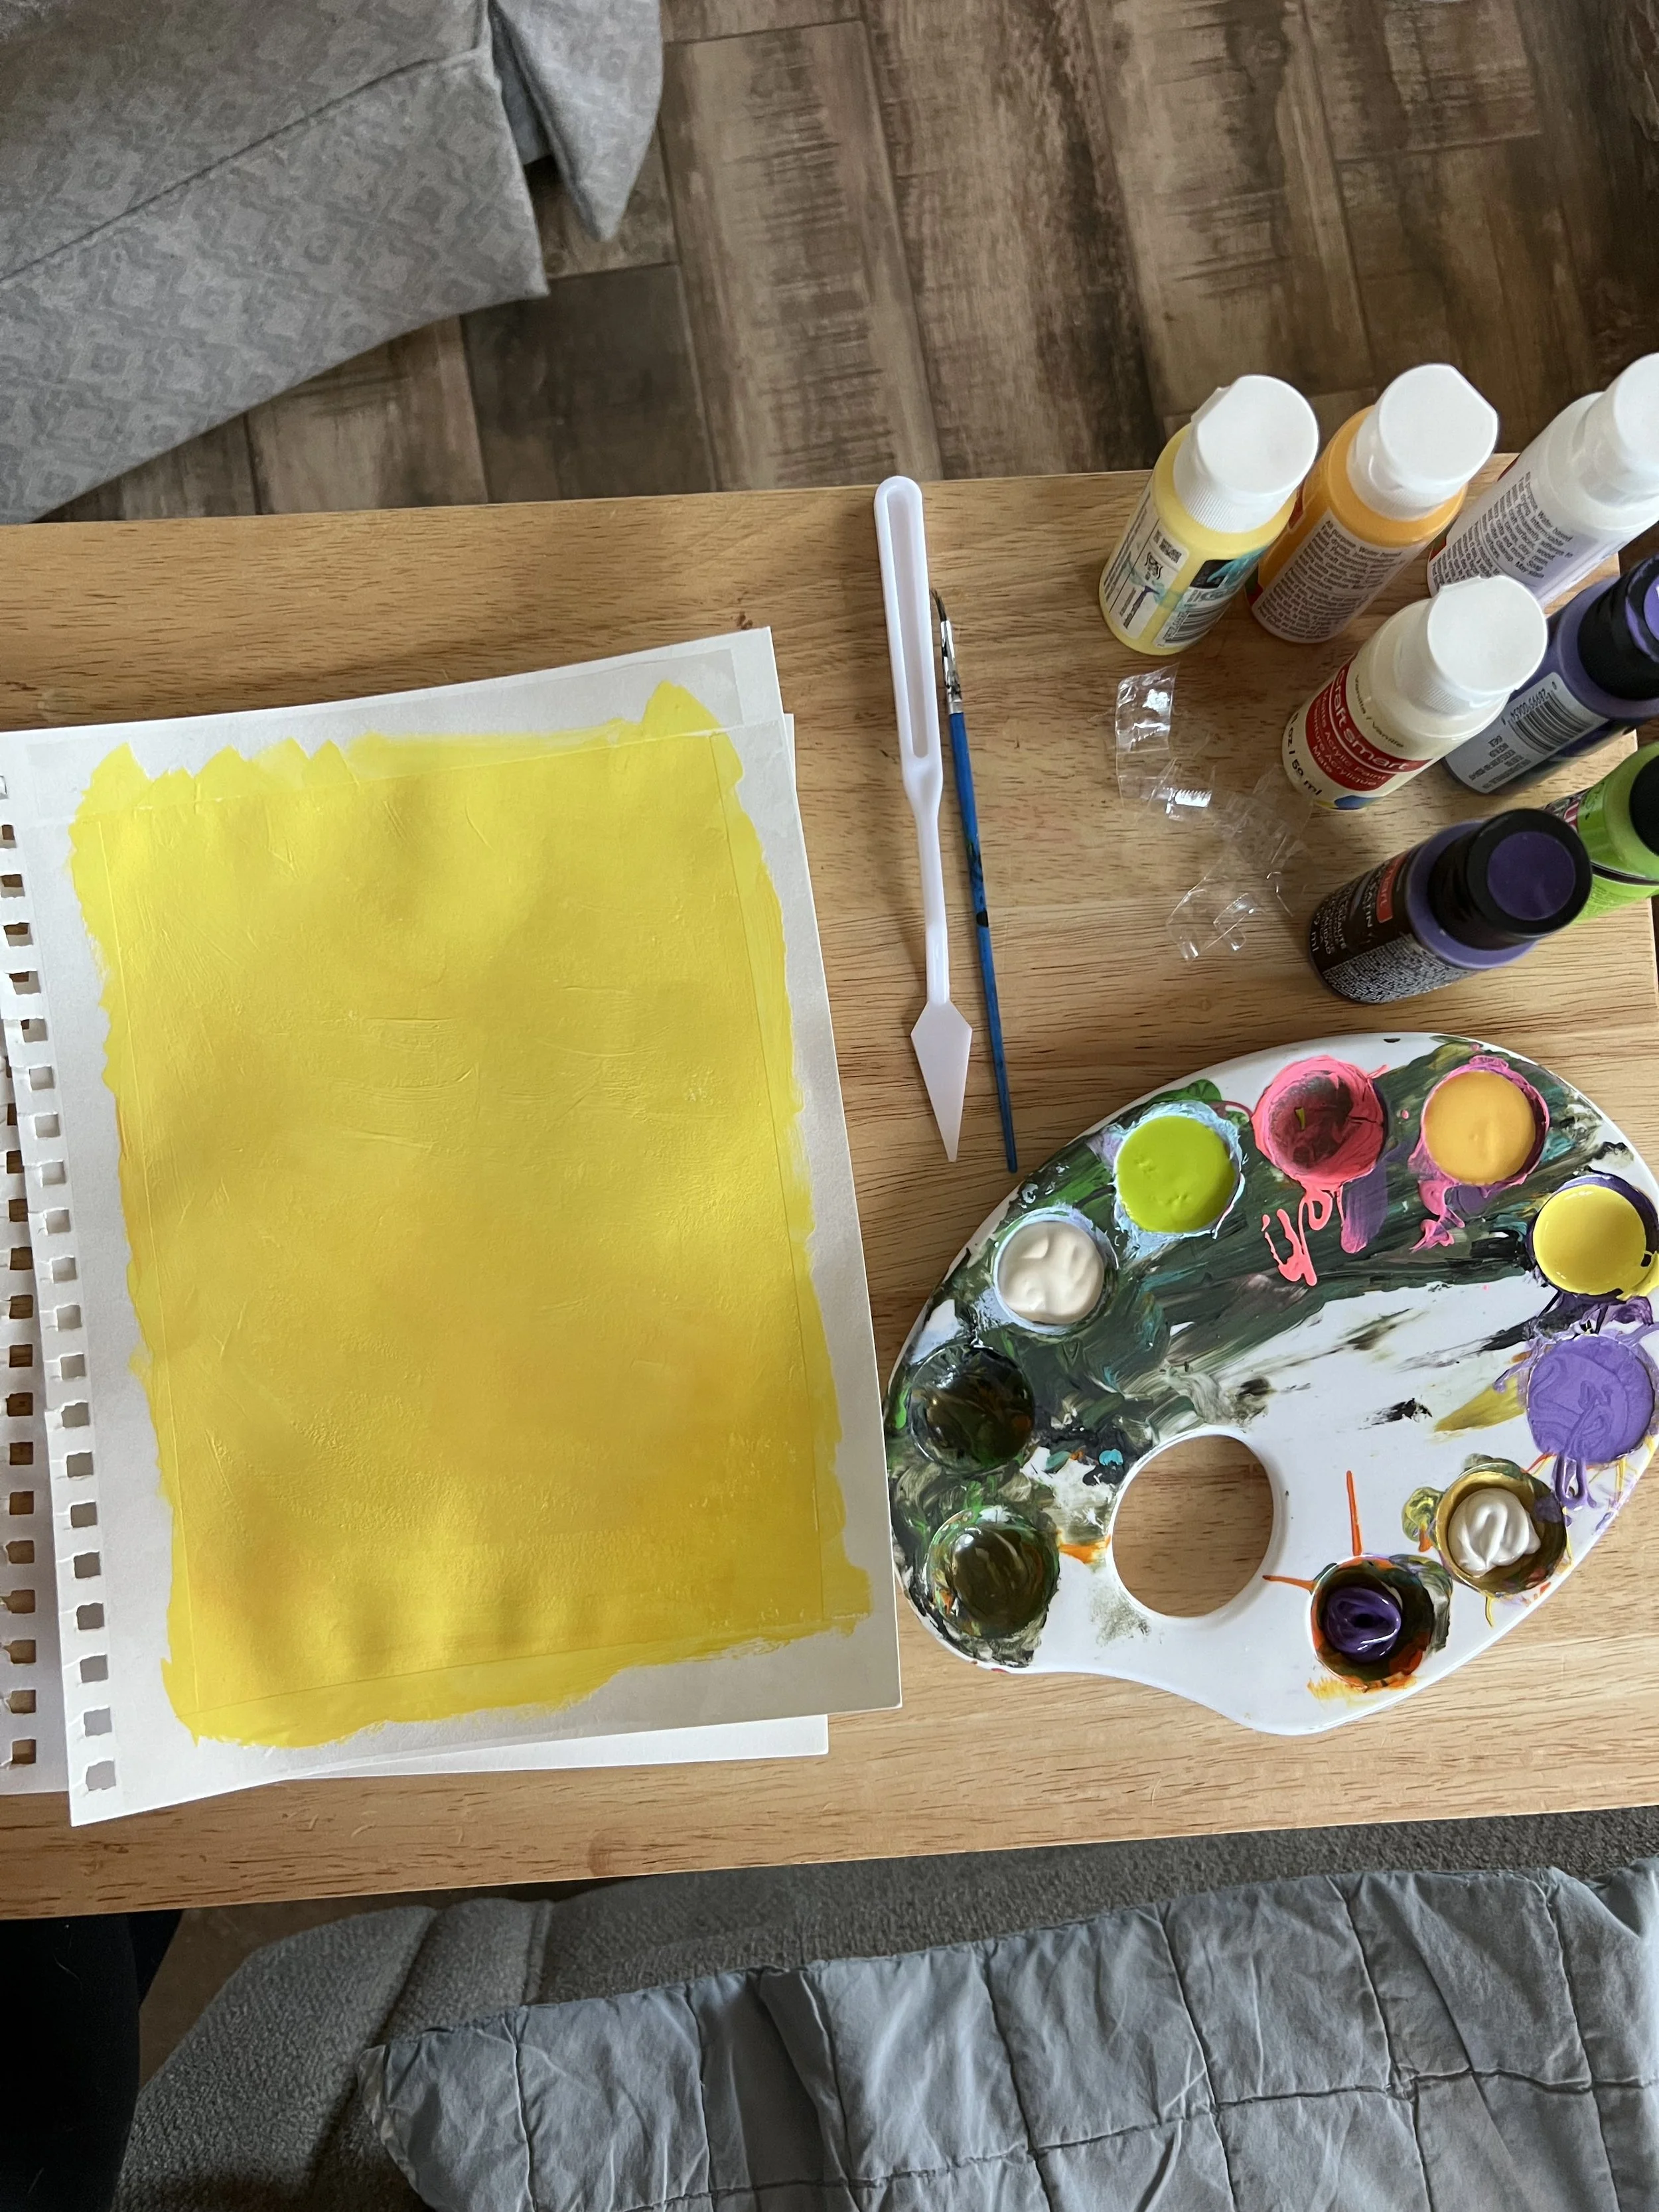
Step 2: Purchase some acrylic paint. You can buy this on Amazon, Walmart, Hobby Lobby, Michaels, etc. Choose colors they like as well as complementary colors. Depending on what you plan to paint you might need to get specific colors to fit your subject.
Step 3: Decide what your surface is going to be. You can paint on everything from paper to card stock, canvas or hardboard. When deciding on surface you need to think about how the person may display the painting. If they are going to frame it you may want to use card stock or paper. If they will hang it on a wall you can get a canvas or put a wood backing on a hardboard. Different surfaces require different amounts of paint and the way the paint sits on the surface changes the way the painting looks. Just consider these things when deciding on what is best.
Step 4: Purchase a variety of sizes of paint brushes. Different sizes will allow you to make different strokes. Larger ones are great for the background and smaller ones are great for detail. You can find variety packs at the same locations you buy your paint at. It’s also nice to have a paint pallet to put your paint in. You can also just use a hardboard or a piece of card stock, but it’s kind of nice to have a dedicated paint pallet.
Step 5: Look for inspiration. I think some people get intimidated about coming up with something unique and original to paint especially when first starting out. Did you know that it is perfectly normal to use inspiration you find as a starting point. Also when practicing its great to actually try and remake others art work. It helps you find your own style. I love getting on Pinterest and finding inspiration. I like to pin a lot of different ideas and then kind of mix and match elements I like of different paintings.
Step 6: Set aside some time and a space to work on your painting. Choose a time when you have a few hours of uninterrupted time. And if you are someone who is responsible of taking care of other humans in your life.. by uninterrupted.. I mean 20 minutes of uninterrupted time to put down one coat of paint, and then a little later after you’ve made the food and started the bath, put down another coat of paint and so on and so forth. Ideally I love painting in my at home art studio, but sometimes I paint on a TV tray in my living room. Just have a spot that no one will touch or mess up and that you can leave all your paints and brushes and painting out until you are finished with it.
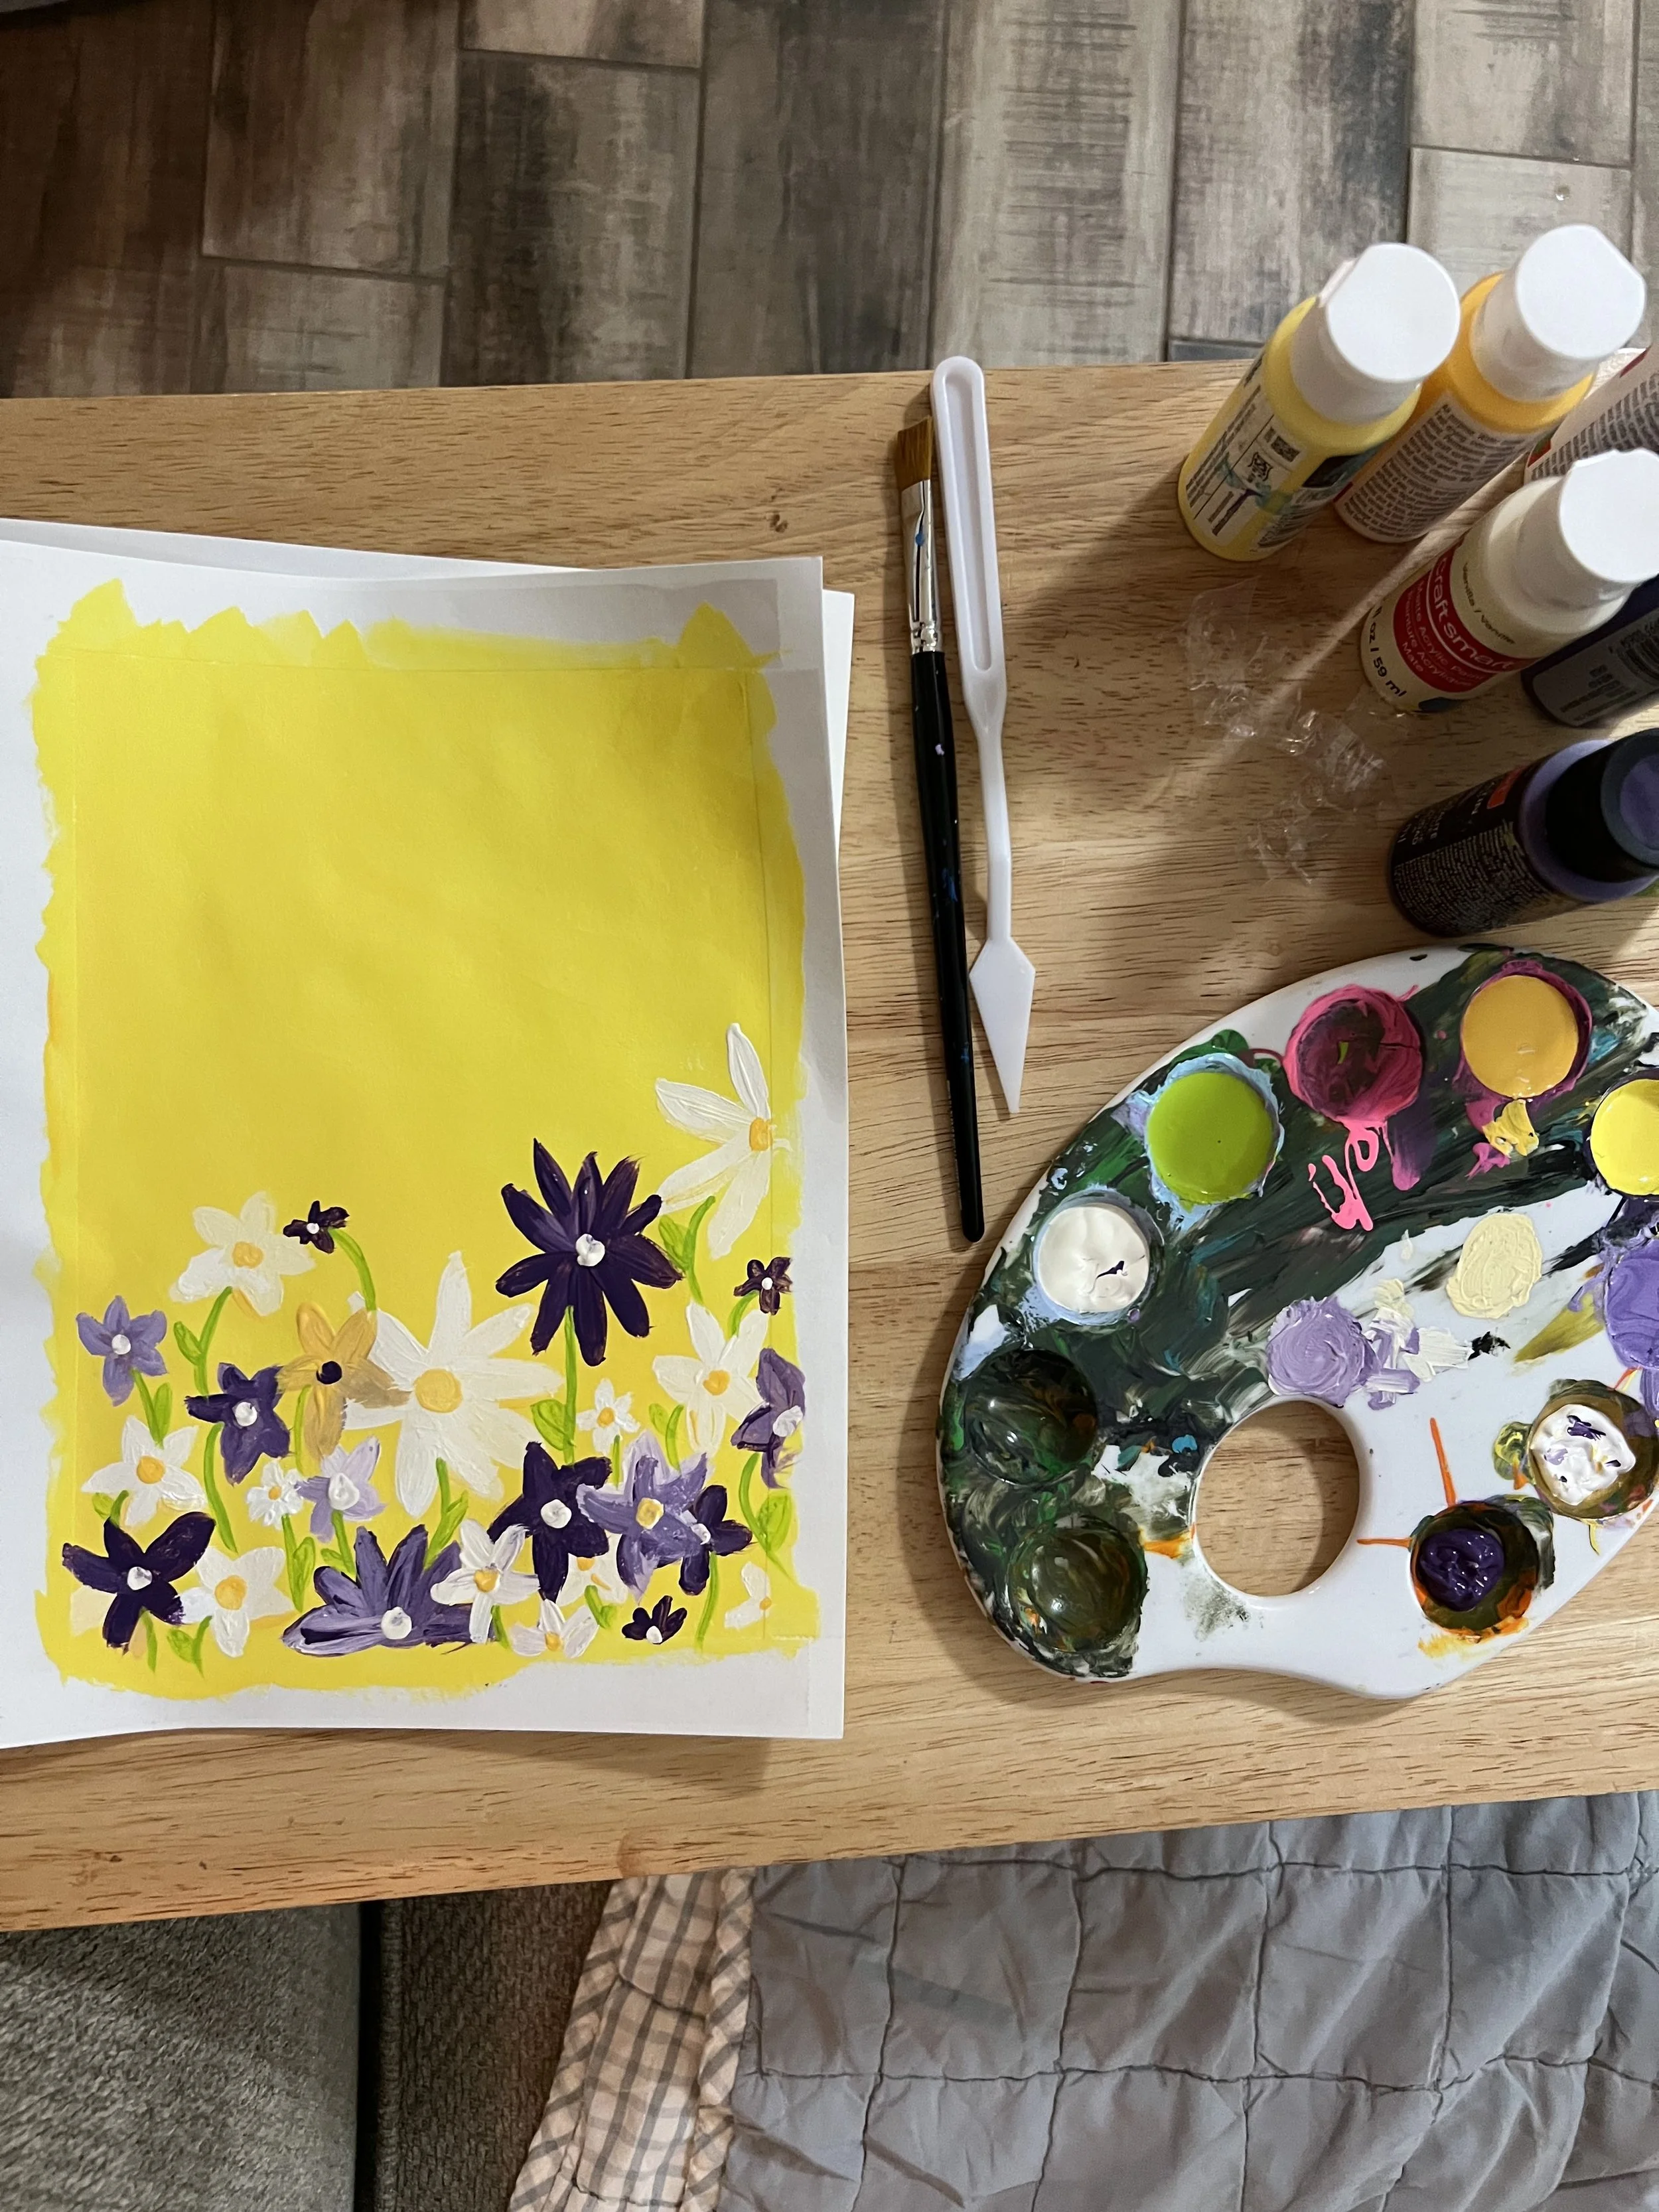
Step 7: Don’t rush your painting. Let it fully dry between coats. Luckily acrylic dries super quick, but if you do try to rush it your paint will get muddy. Remember that the great think about paint is that you can layer it. When you layer it you can show highlights, shadows, depth and detail that will really make it pop. The key is not to rush.
Step 8: Use a reference especially when starting out. It’s way easier to paint a picture of an elephant if you are looking at a picture of an elephant. Unless you intend on your picture to be super whimsical I would suggest using a reference to see where shadows and highlights hit, the sizing and proportion of the object and where parts of the object are located.
Step 9: Whatever you choose to paint, especially if it is a gift for someone, try and make it meaningful. Again this can be by using their favorite colors, adding an inspiring verse or quote, painting something they truly love, etc. By choosing something that is meaningful to that person it will really elevate your painting and it will hold such a special place in their heart. The goal of this challenge is to not only activate your creativity, but it’s also about showing those around you how much you love and appreciate them.
Step 10: Don’t be scared to just start. It’s ok if you mess up. Paint is forgiving. You can always just paint over anything you don’t like. Don’t be hard on yourself. As the artist you see the most flaws in your painting. Most people won’t even notice things that you think are mistakes. Be brave. The person you are painting something for will absolutely love what you gift them because it came from you and you thought of them.


February
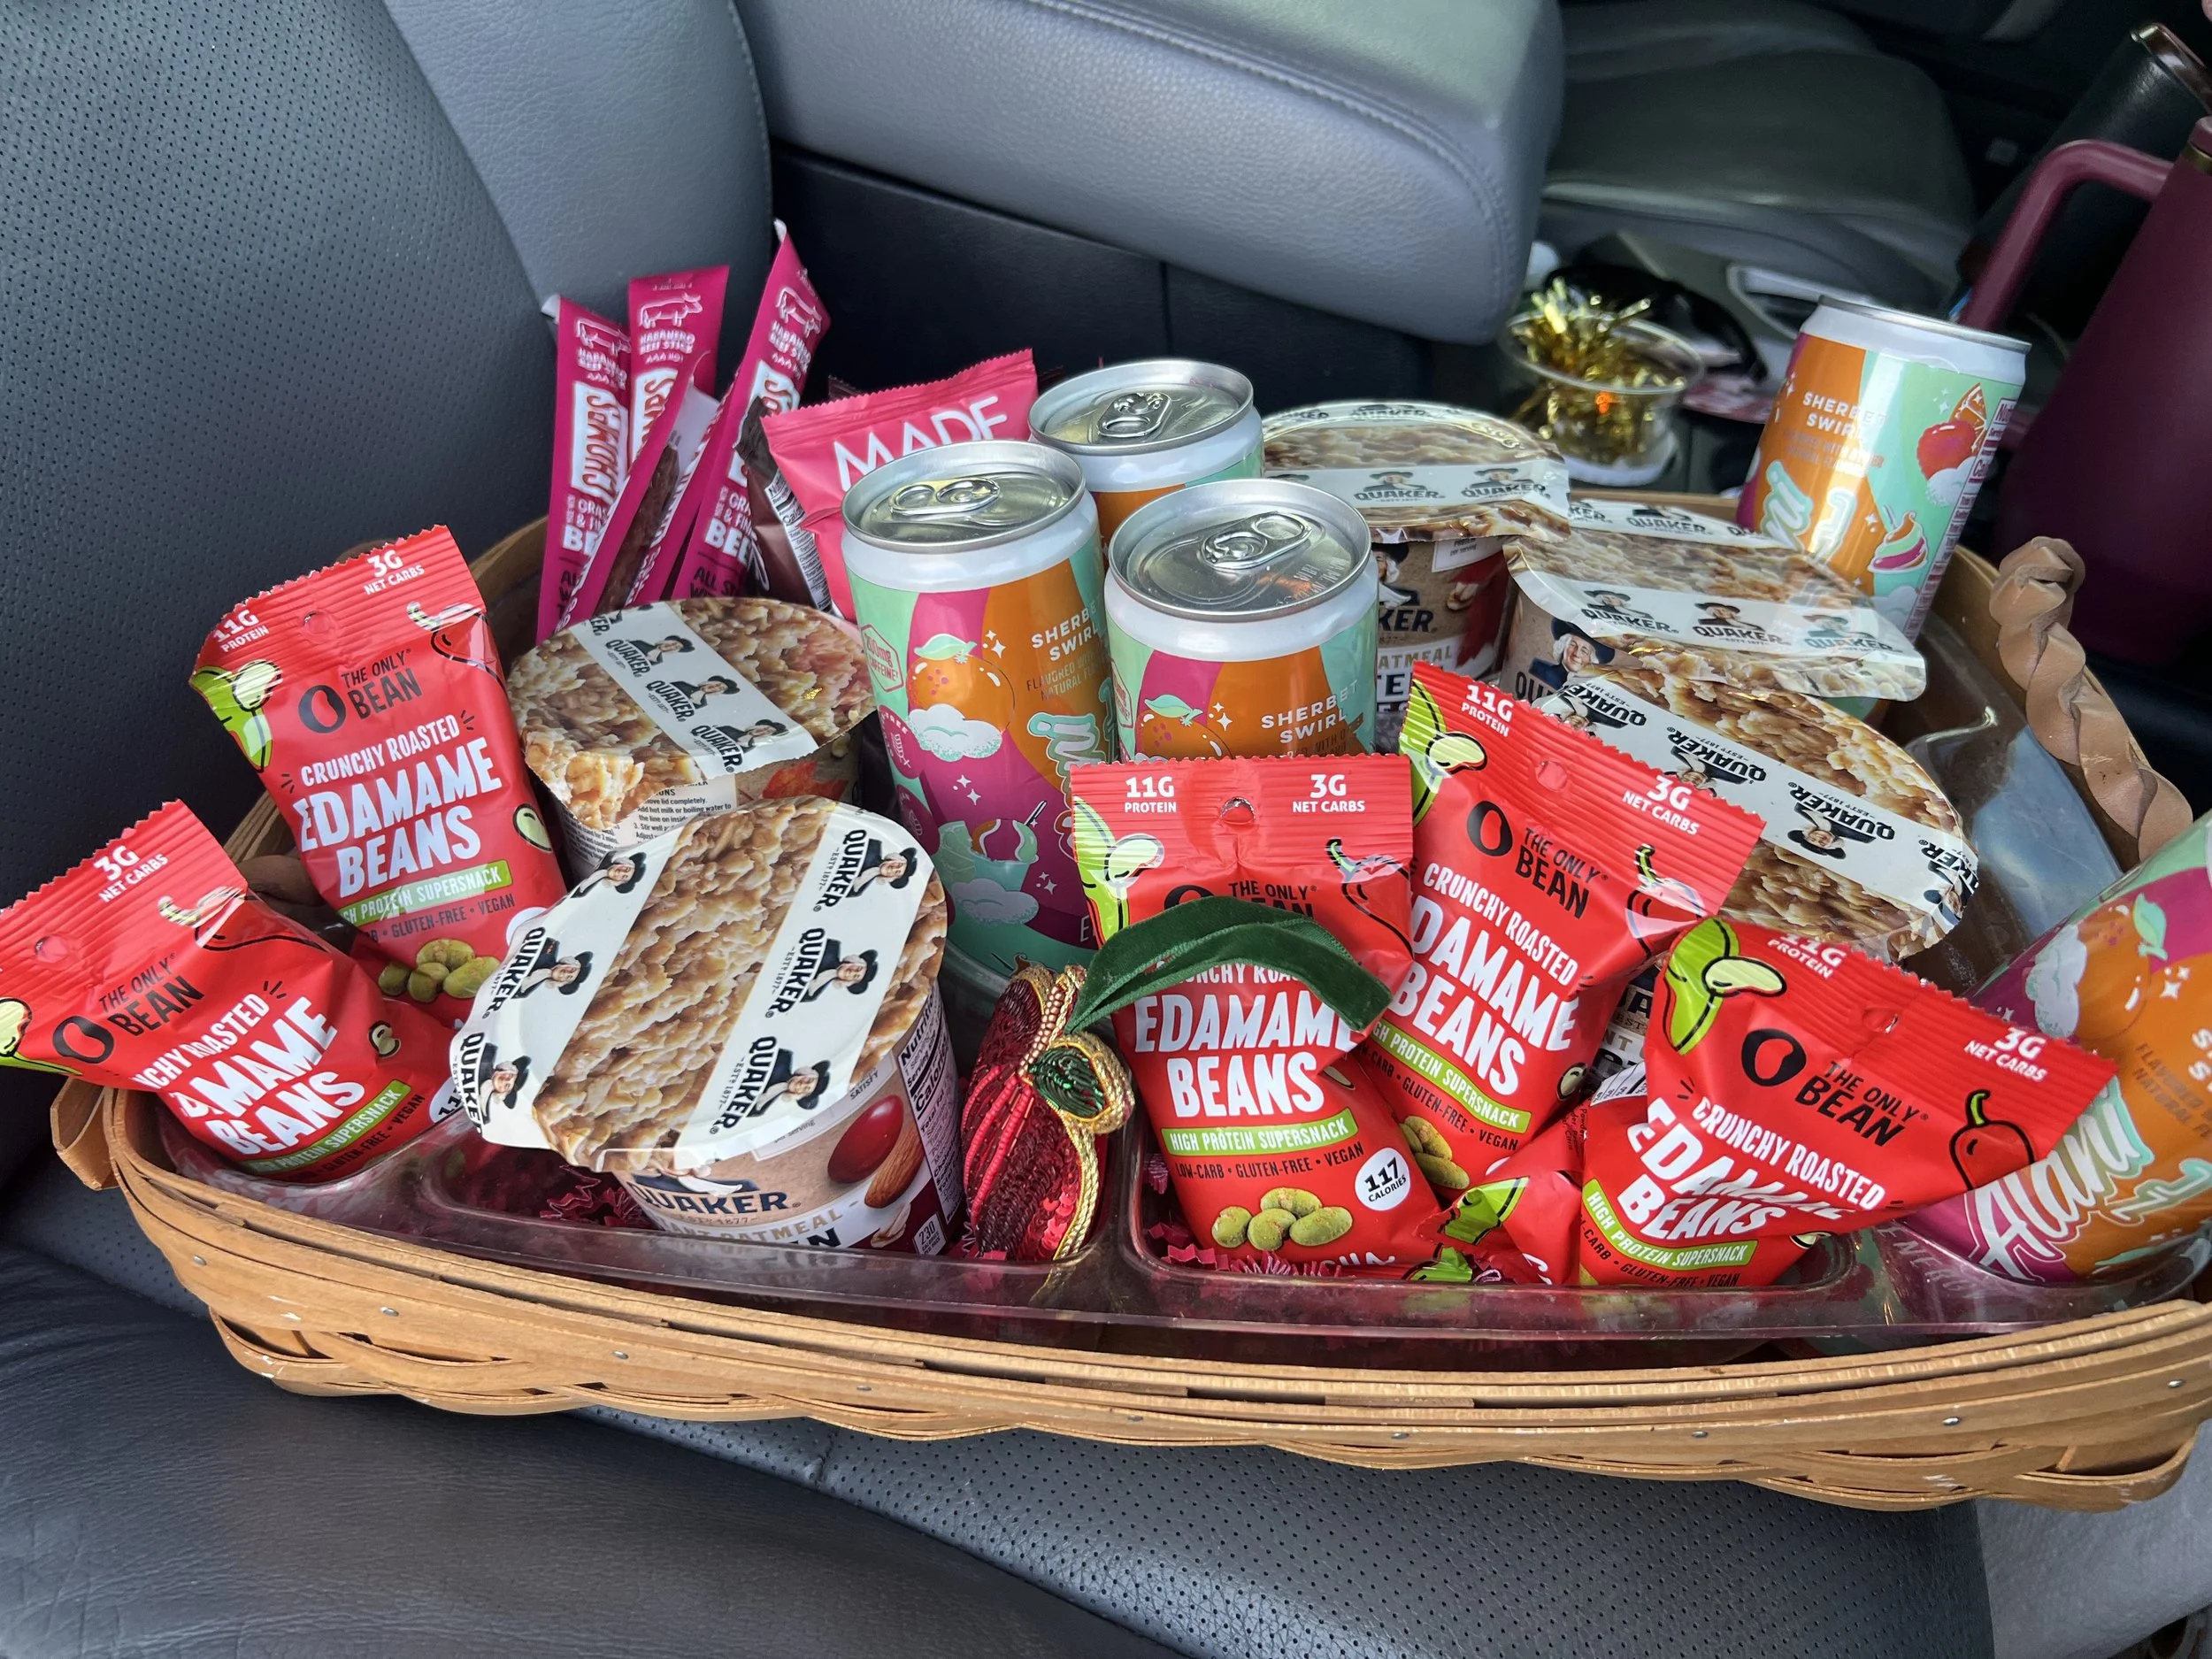
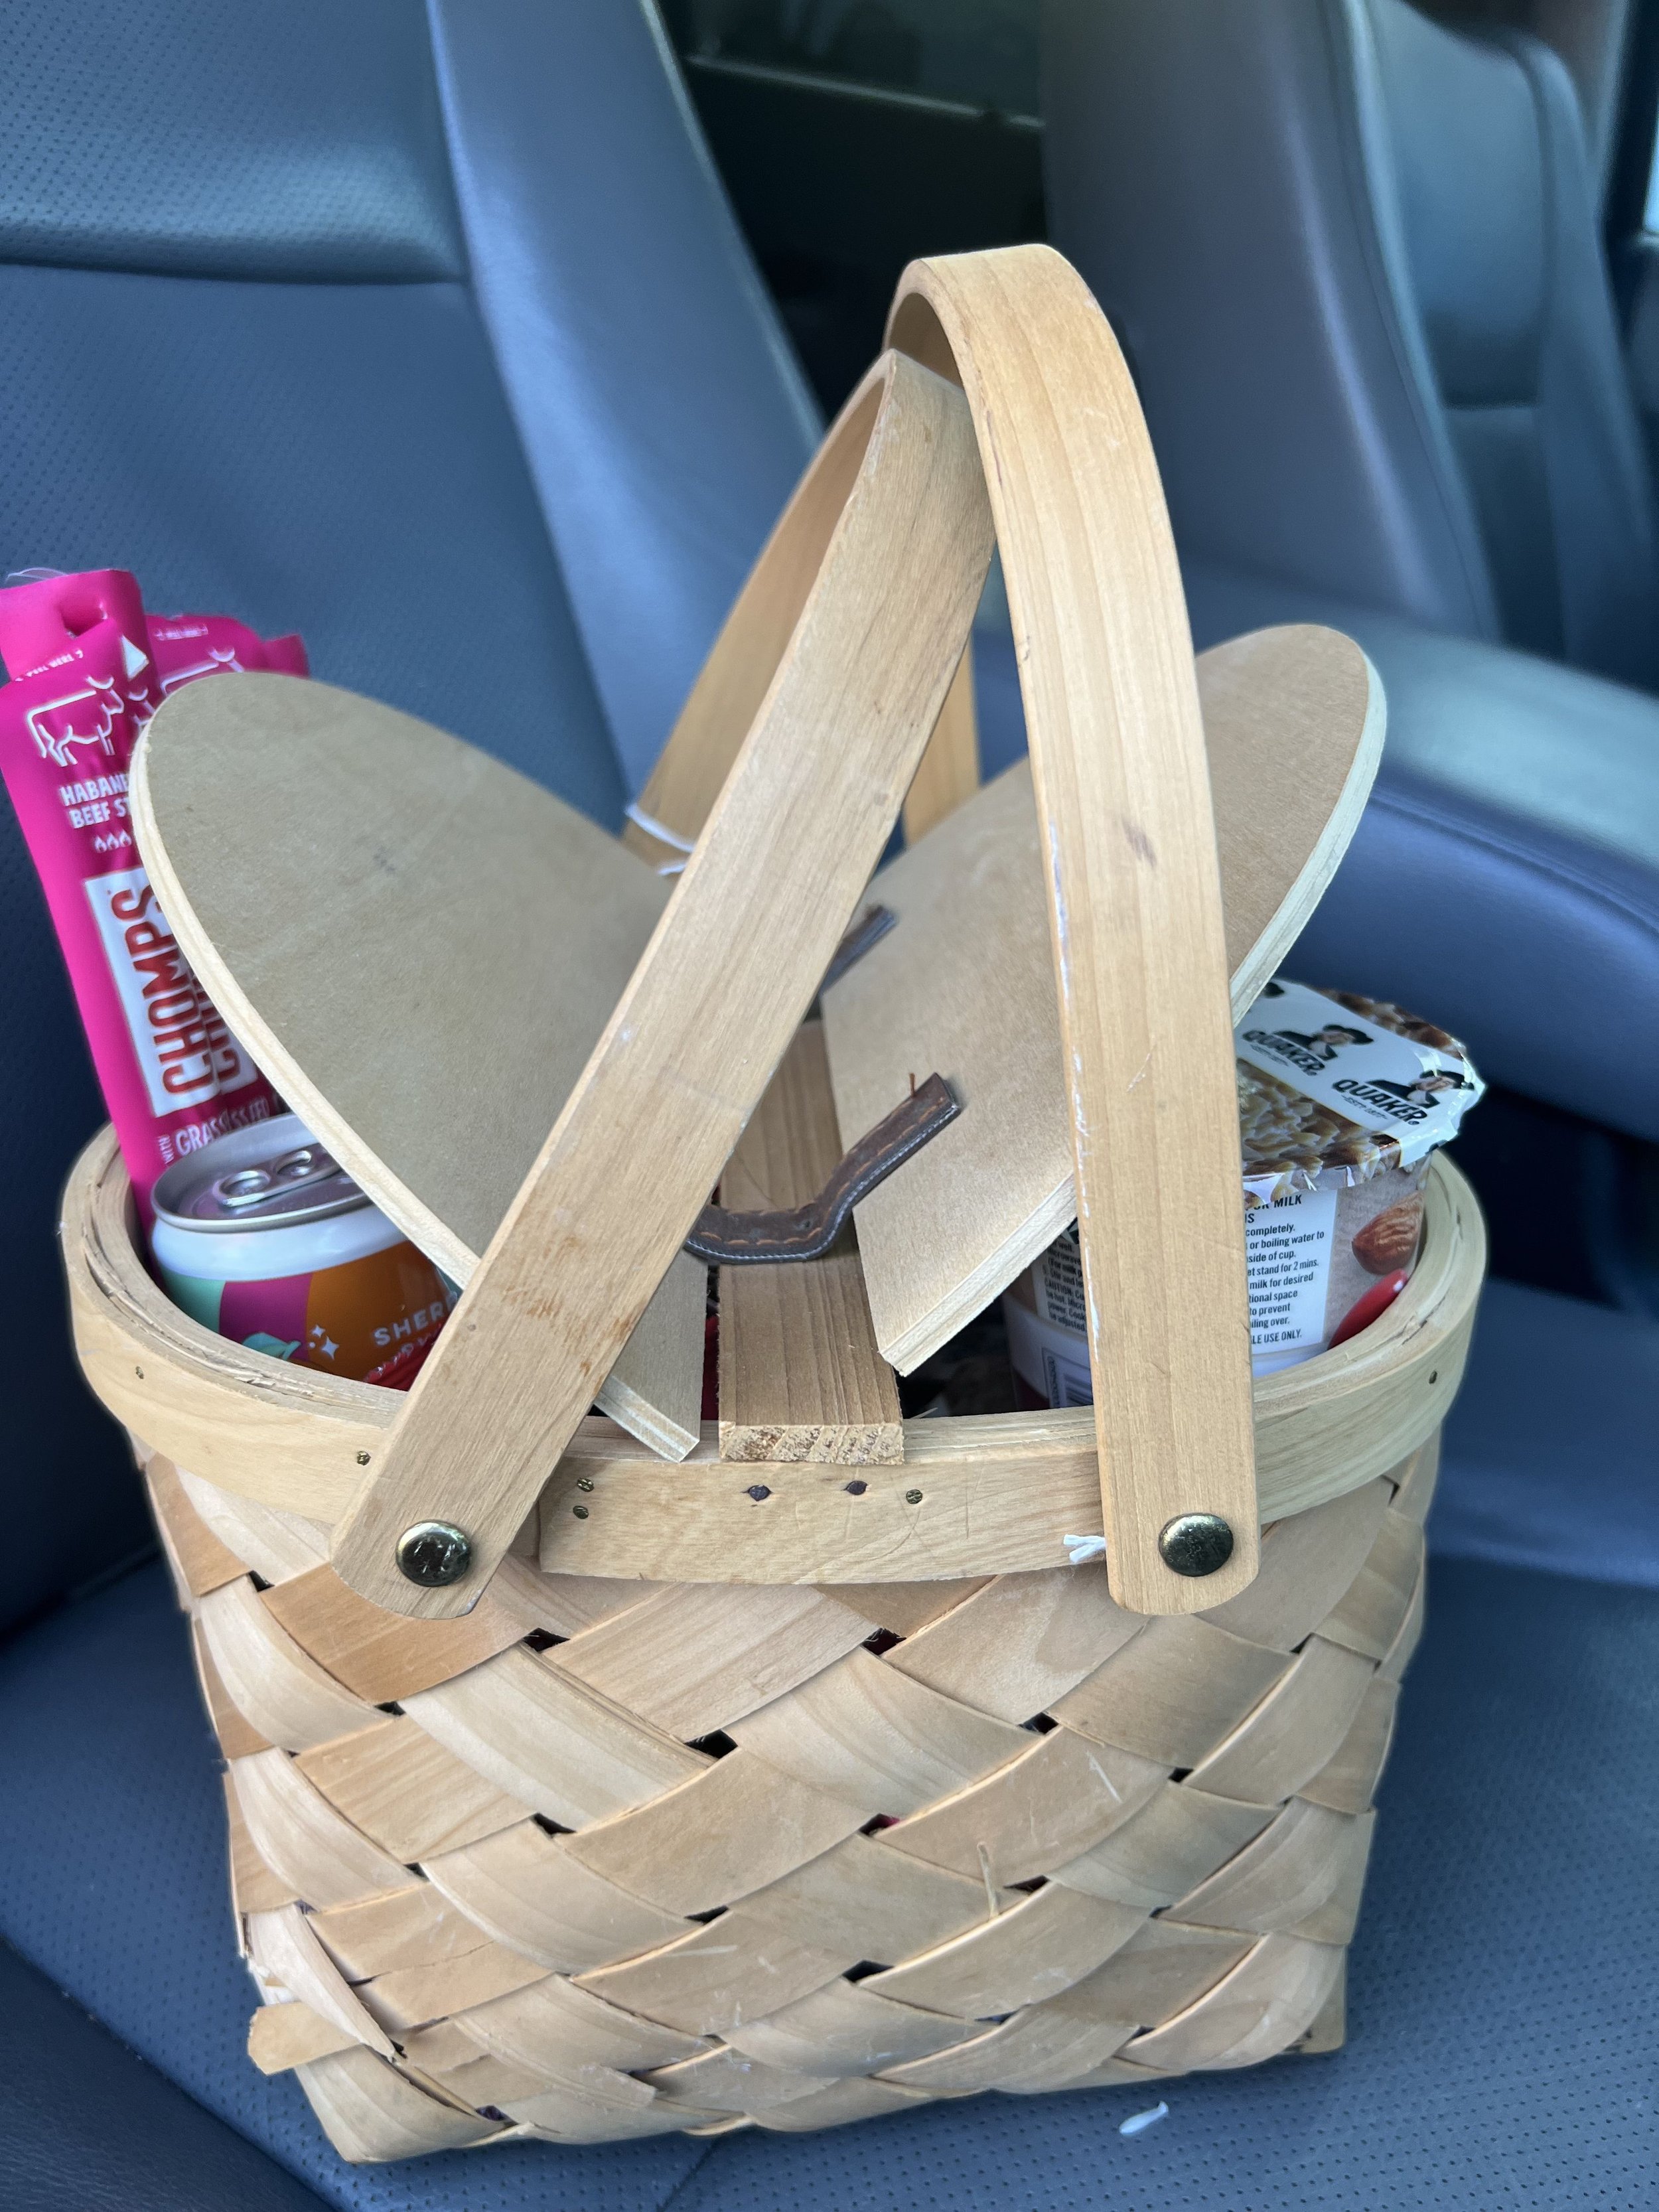
For my February creative gift challenge I knew I wanted to gift my kids teachers something fun, something practical and something to get them through the 2nd semester so I decided to go with a basket full of snacks including caffeine and protein. My criteria for the snacks that I purchased were they had to have red and pink packaging to make sure it fit the seasonal aesthetic and they had to be packed with protein or caffeine. When it came to searching for baskets to display them in, I wanted to get something that looked unique and that could be repurposed after the snacks were gone. In our town we have the cutest antique store and I knew thats exactly where I needed to go. It’s been my goal in the last few years to really try to shop local. In my experience you get higher quality, more unique and it just feels extra special. When I found these baskets, one with divided out slots and one that is a picnic basket I knew they would be perfect! Sometimes coming up with a creative gift for someone just starts by walking into a local store and browsing. I challenge you to head into your local stores today and see what you can find for someone special in your life.
March
-
![]()
Step One - Request a reference photo
-
![]()
Step Two - Drawing
-
![]()
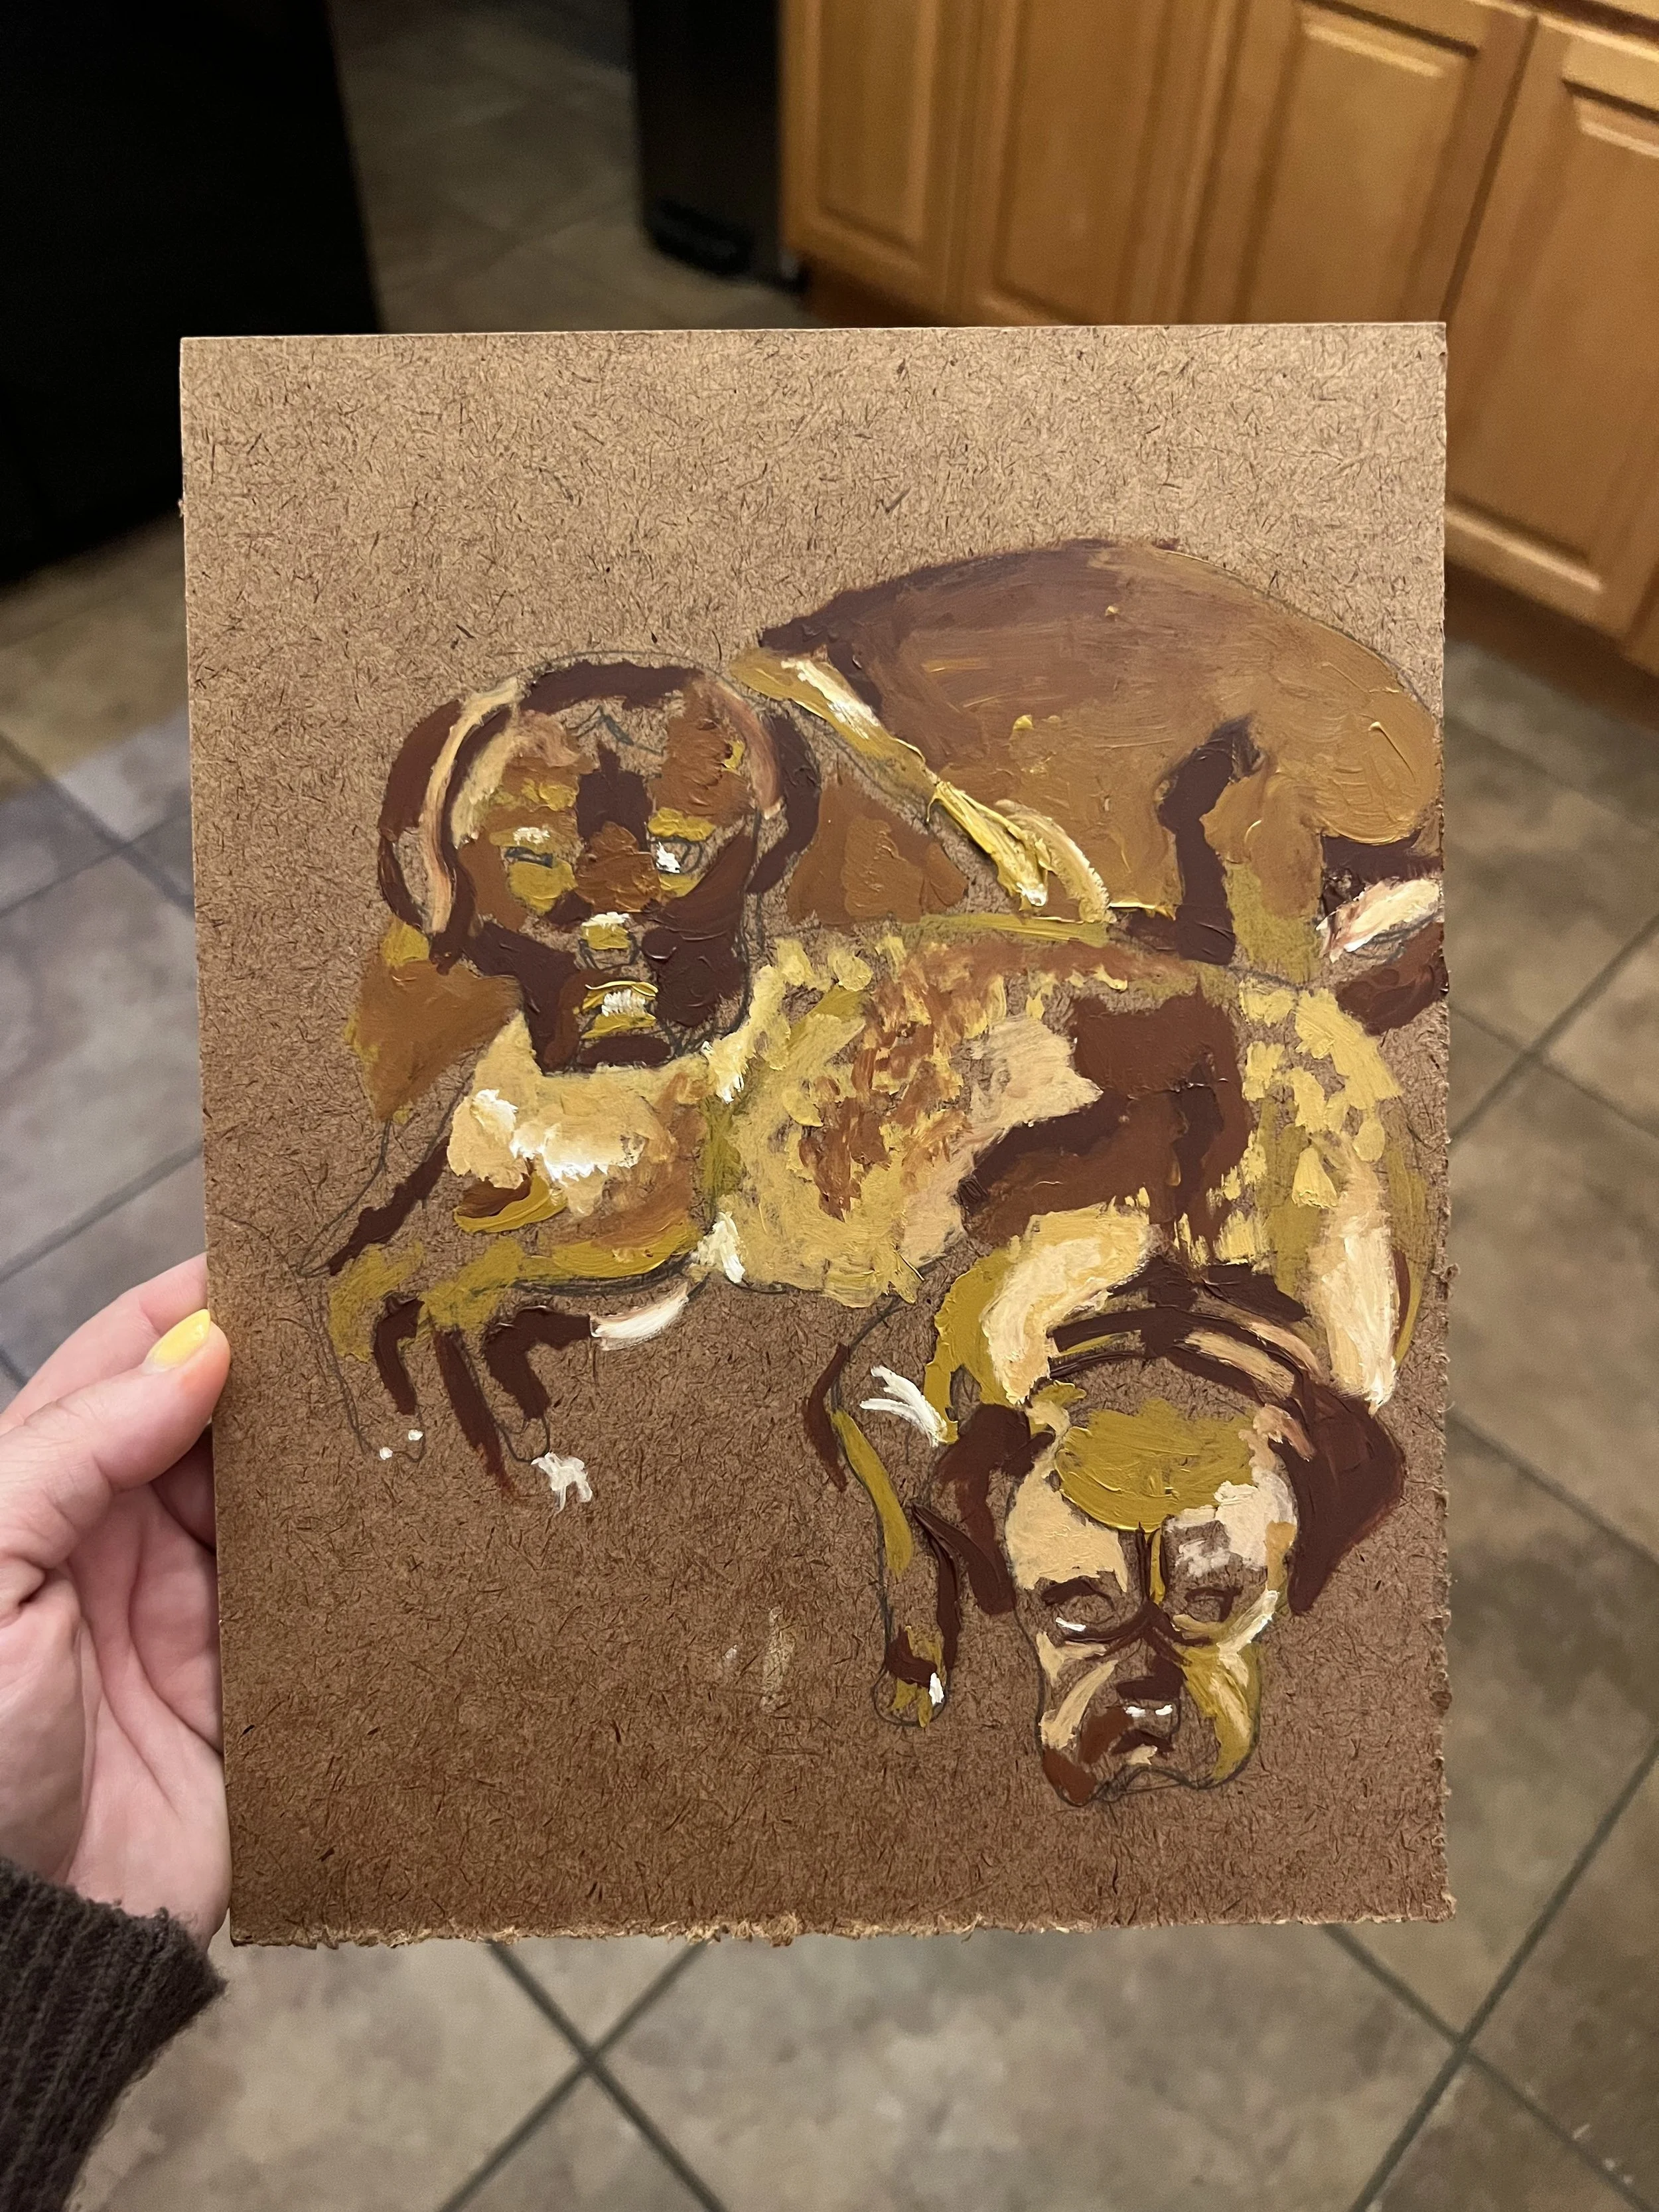
Step Three - Base Coat
-
![]()
Step Four - Highlights & Shadows
-
![]()
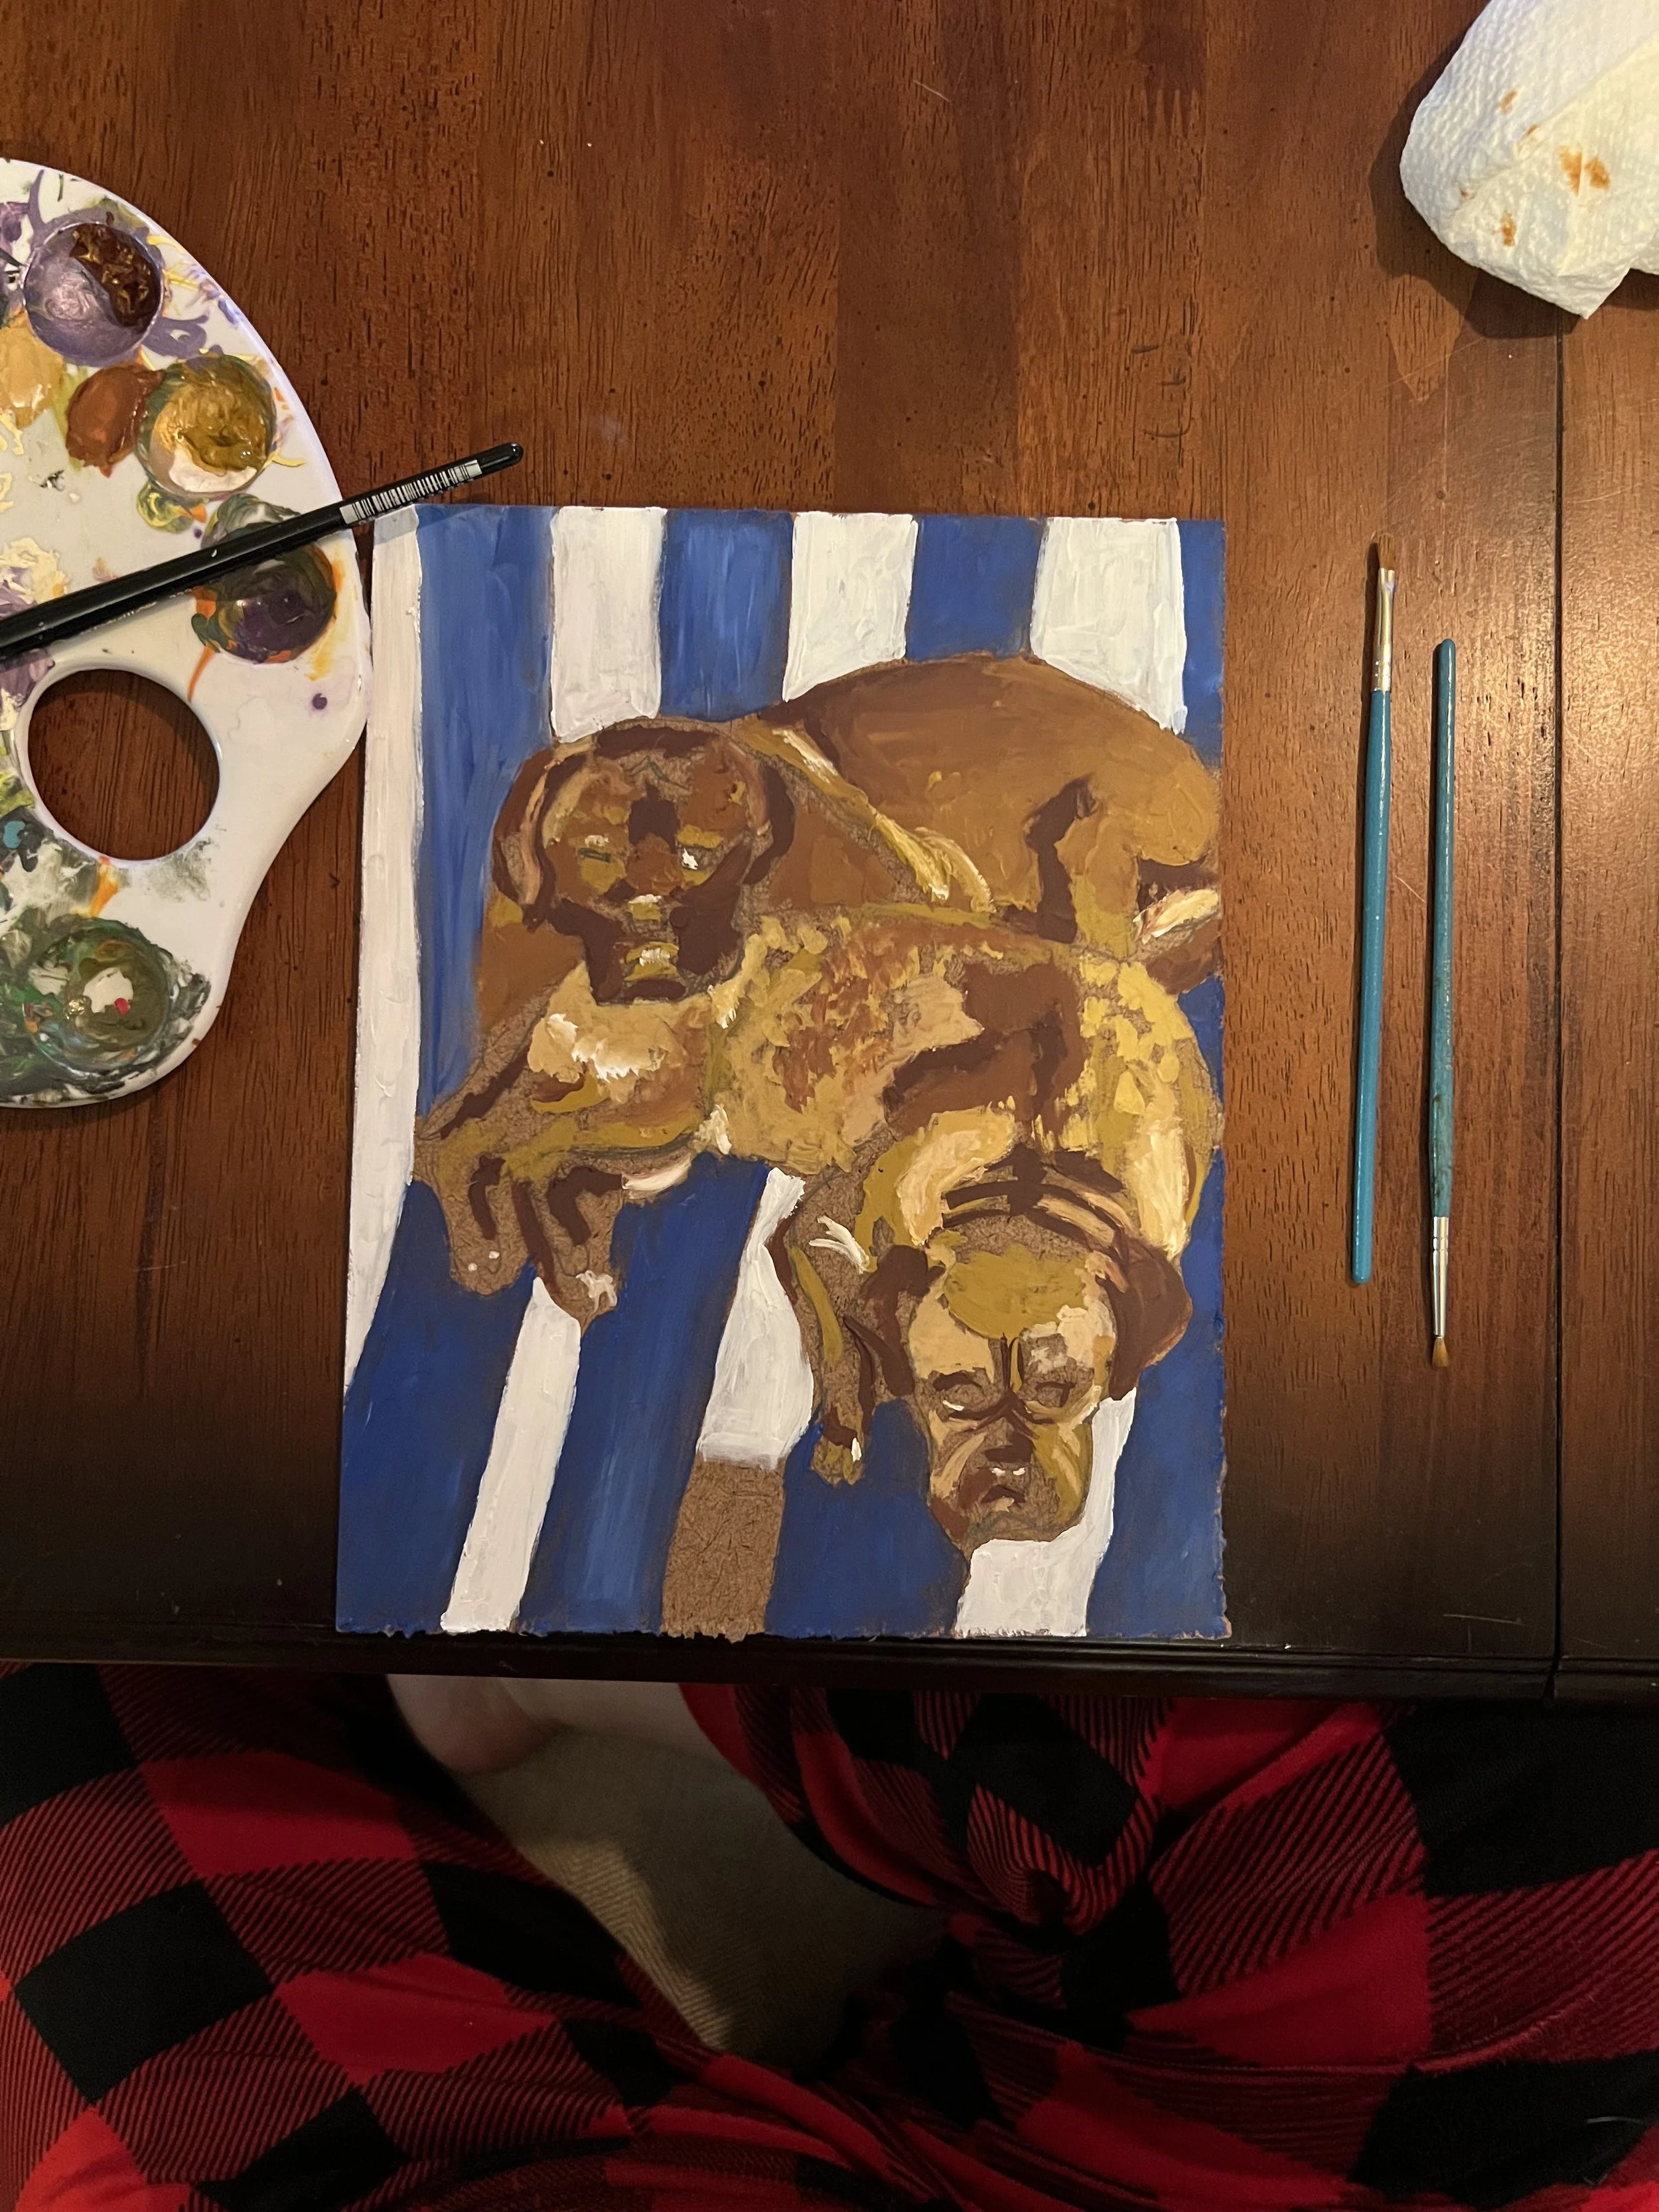
Step Five - Travel
-
![]()
Step Six - Depth
-
![]()
Step Seven - Blend
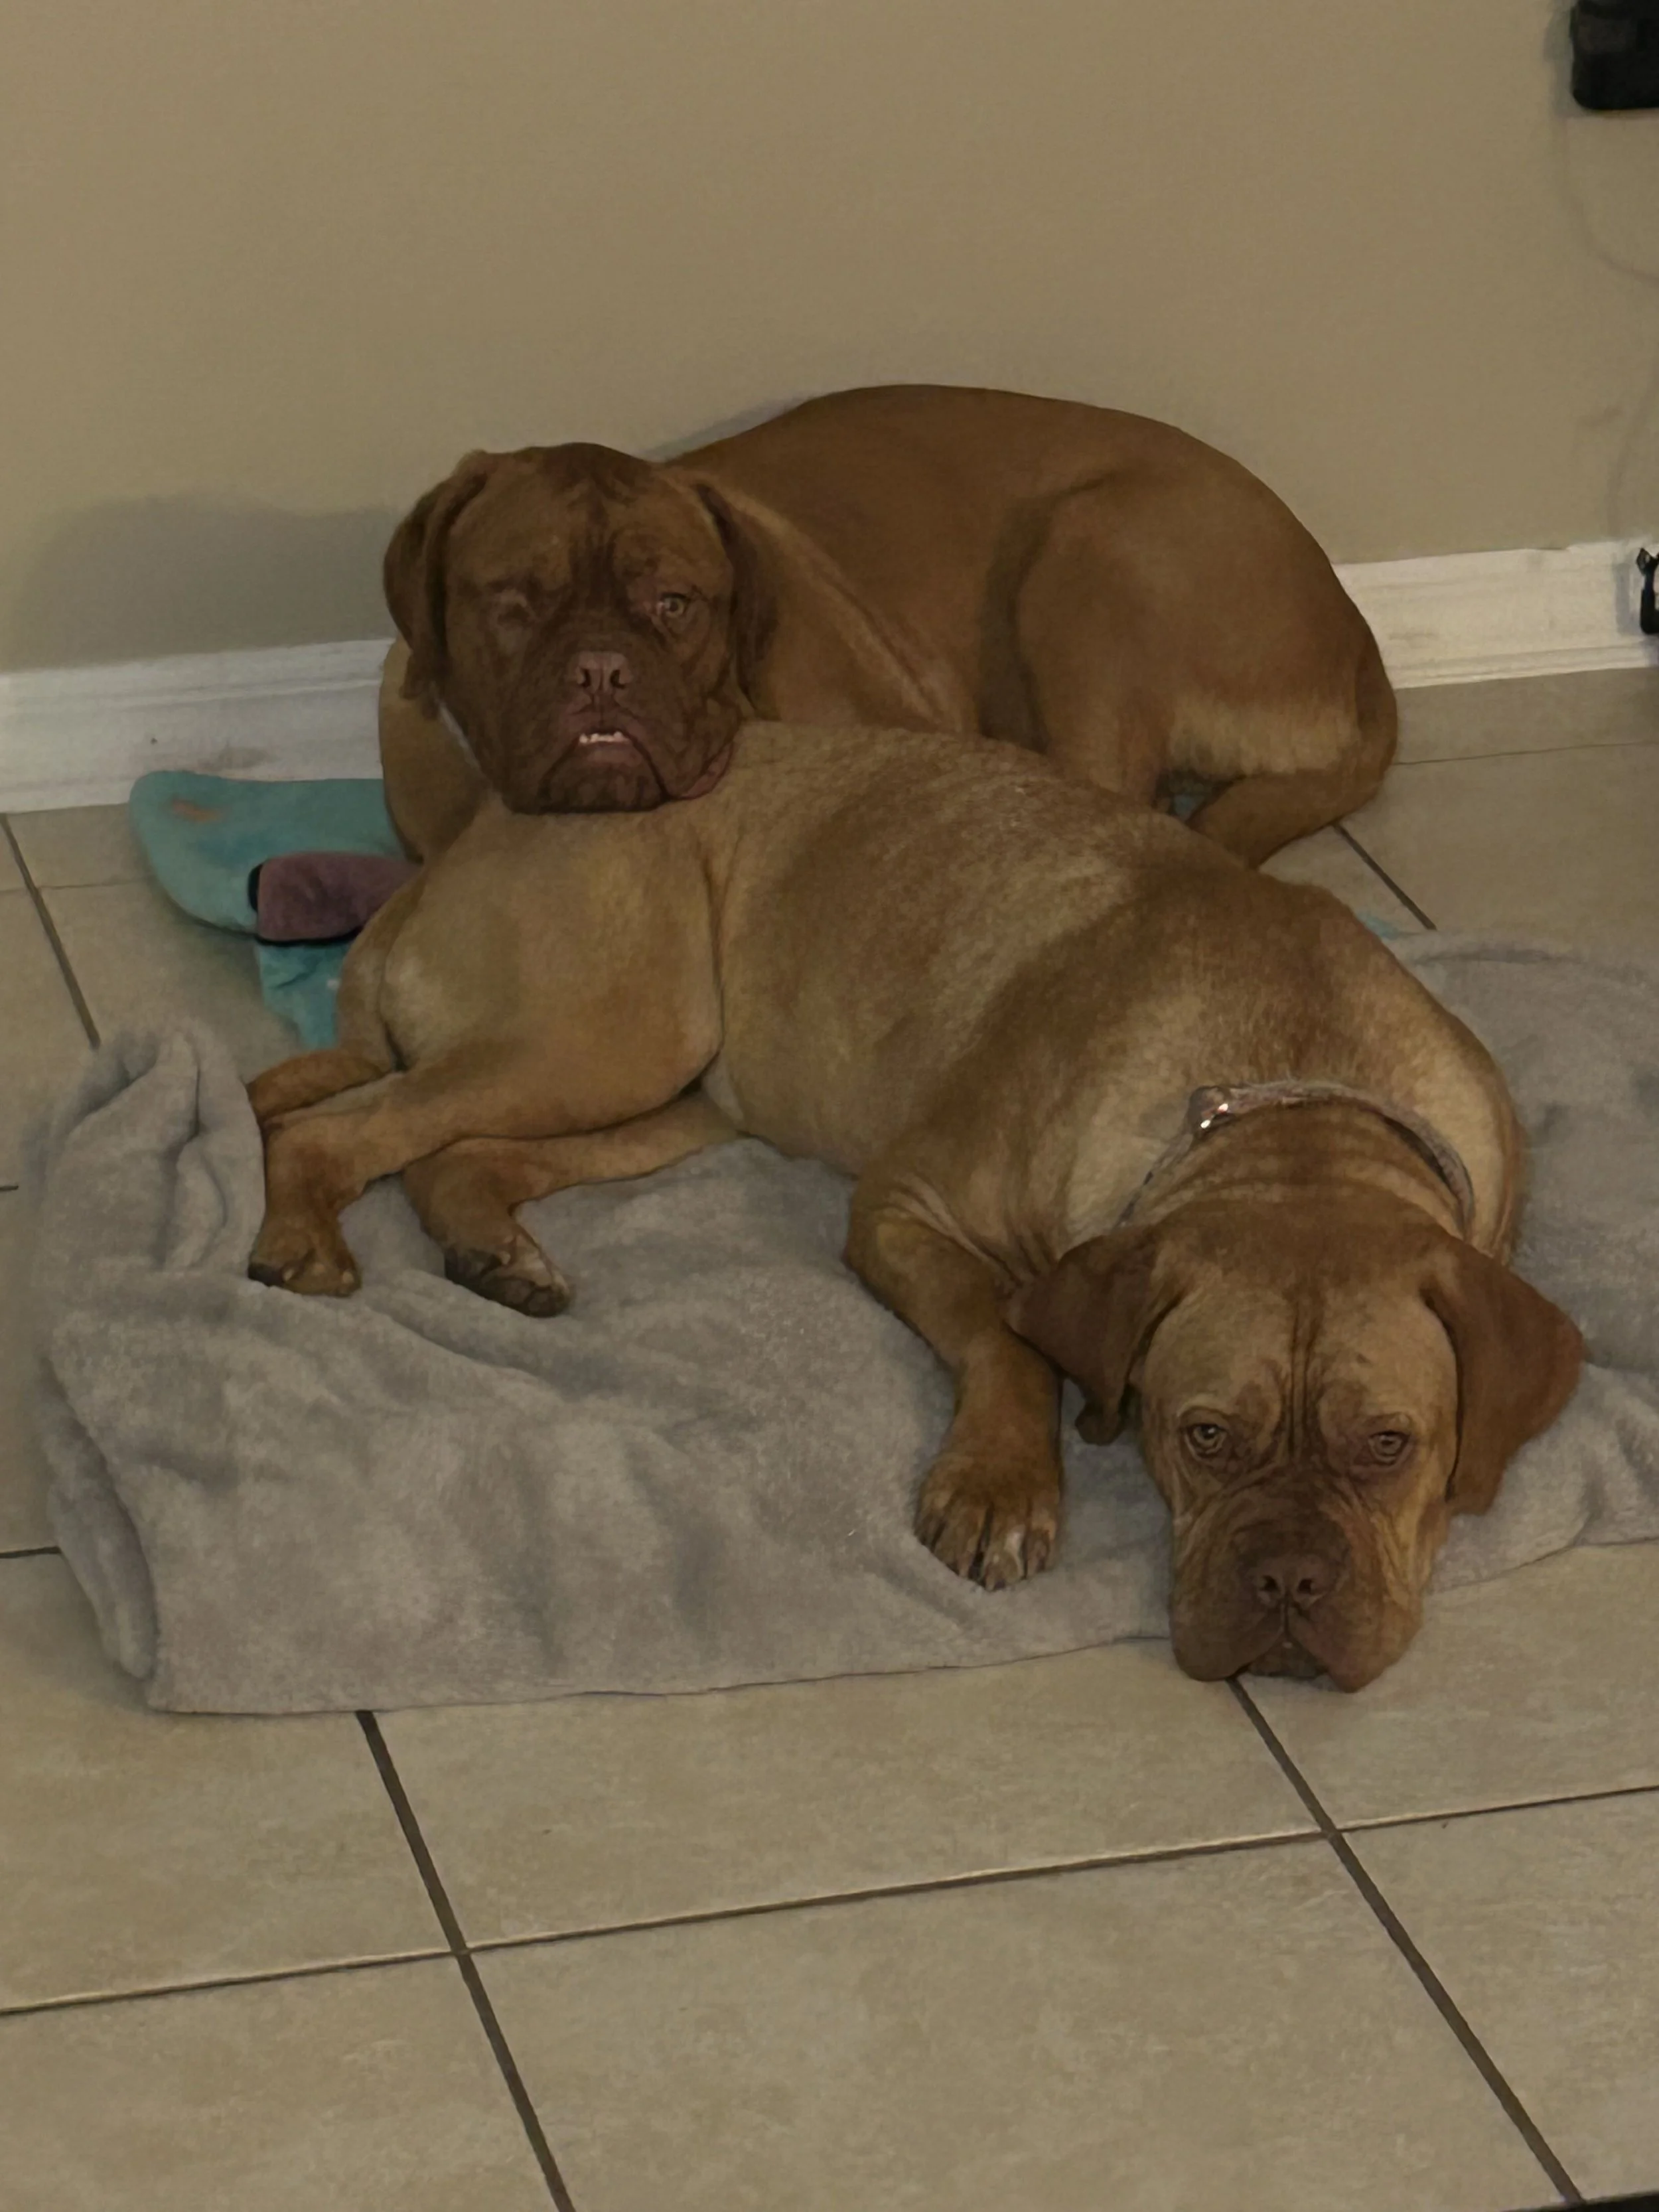
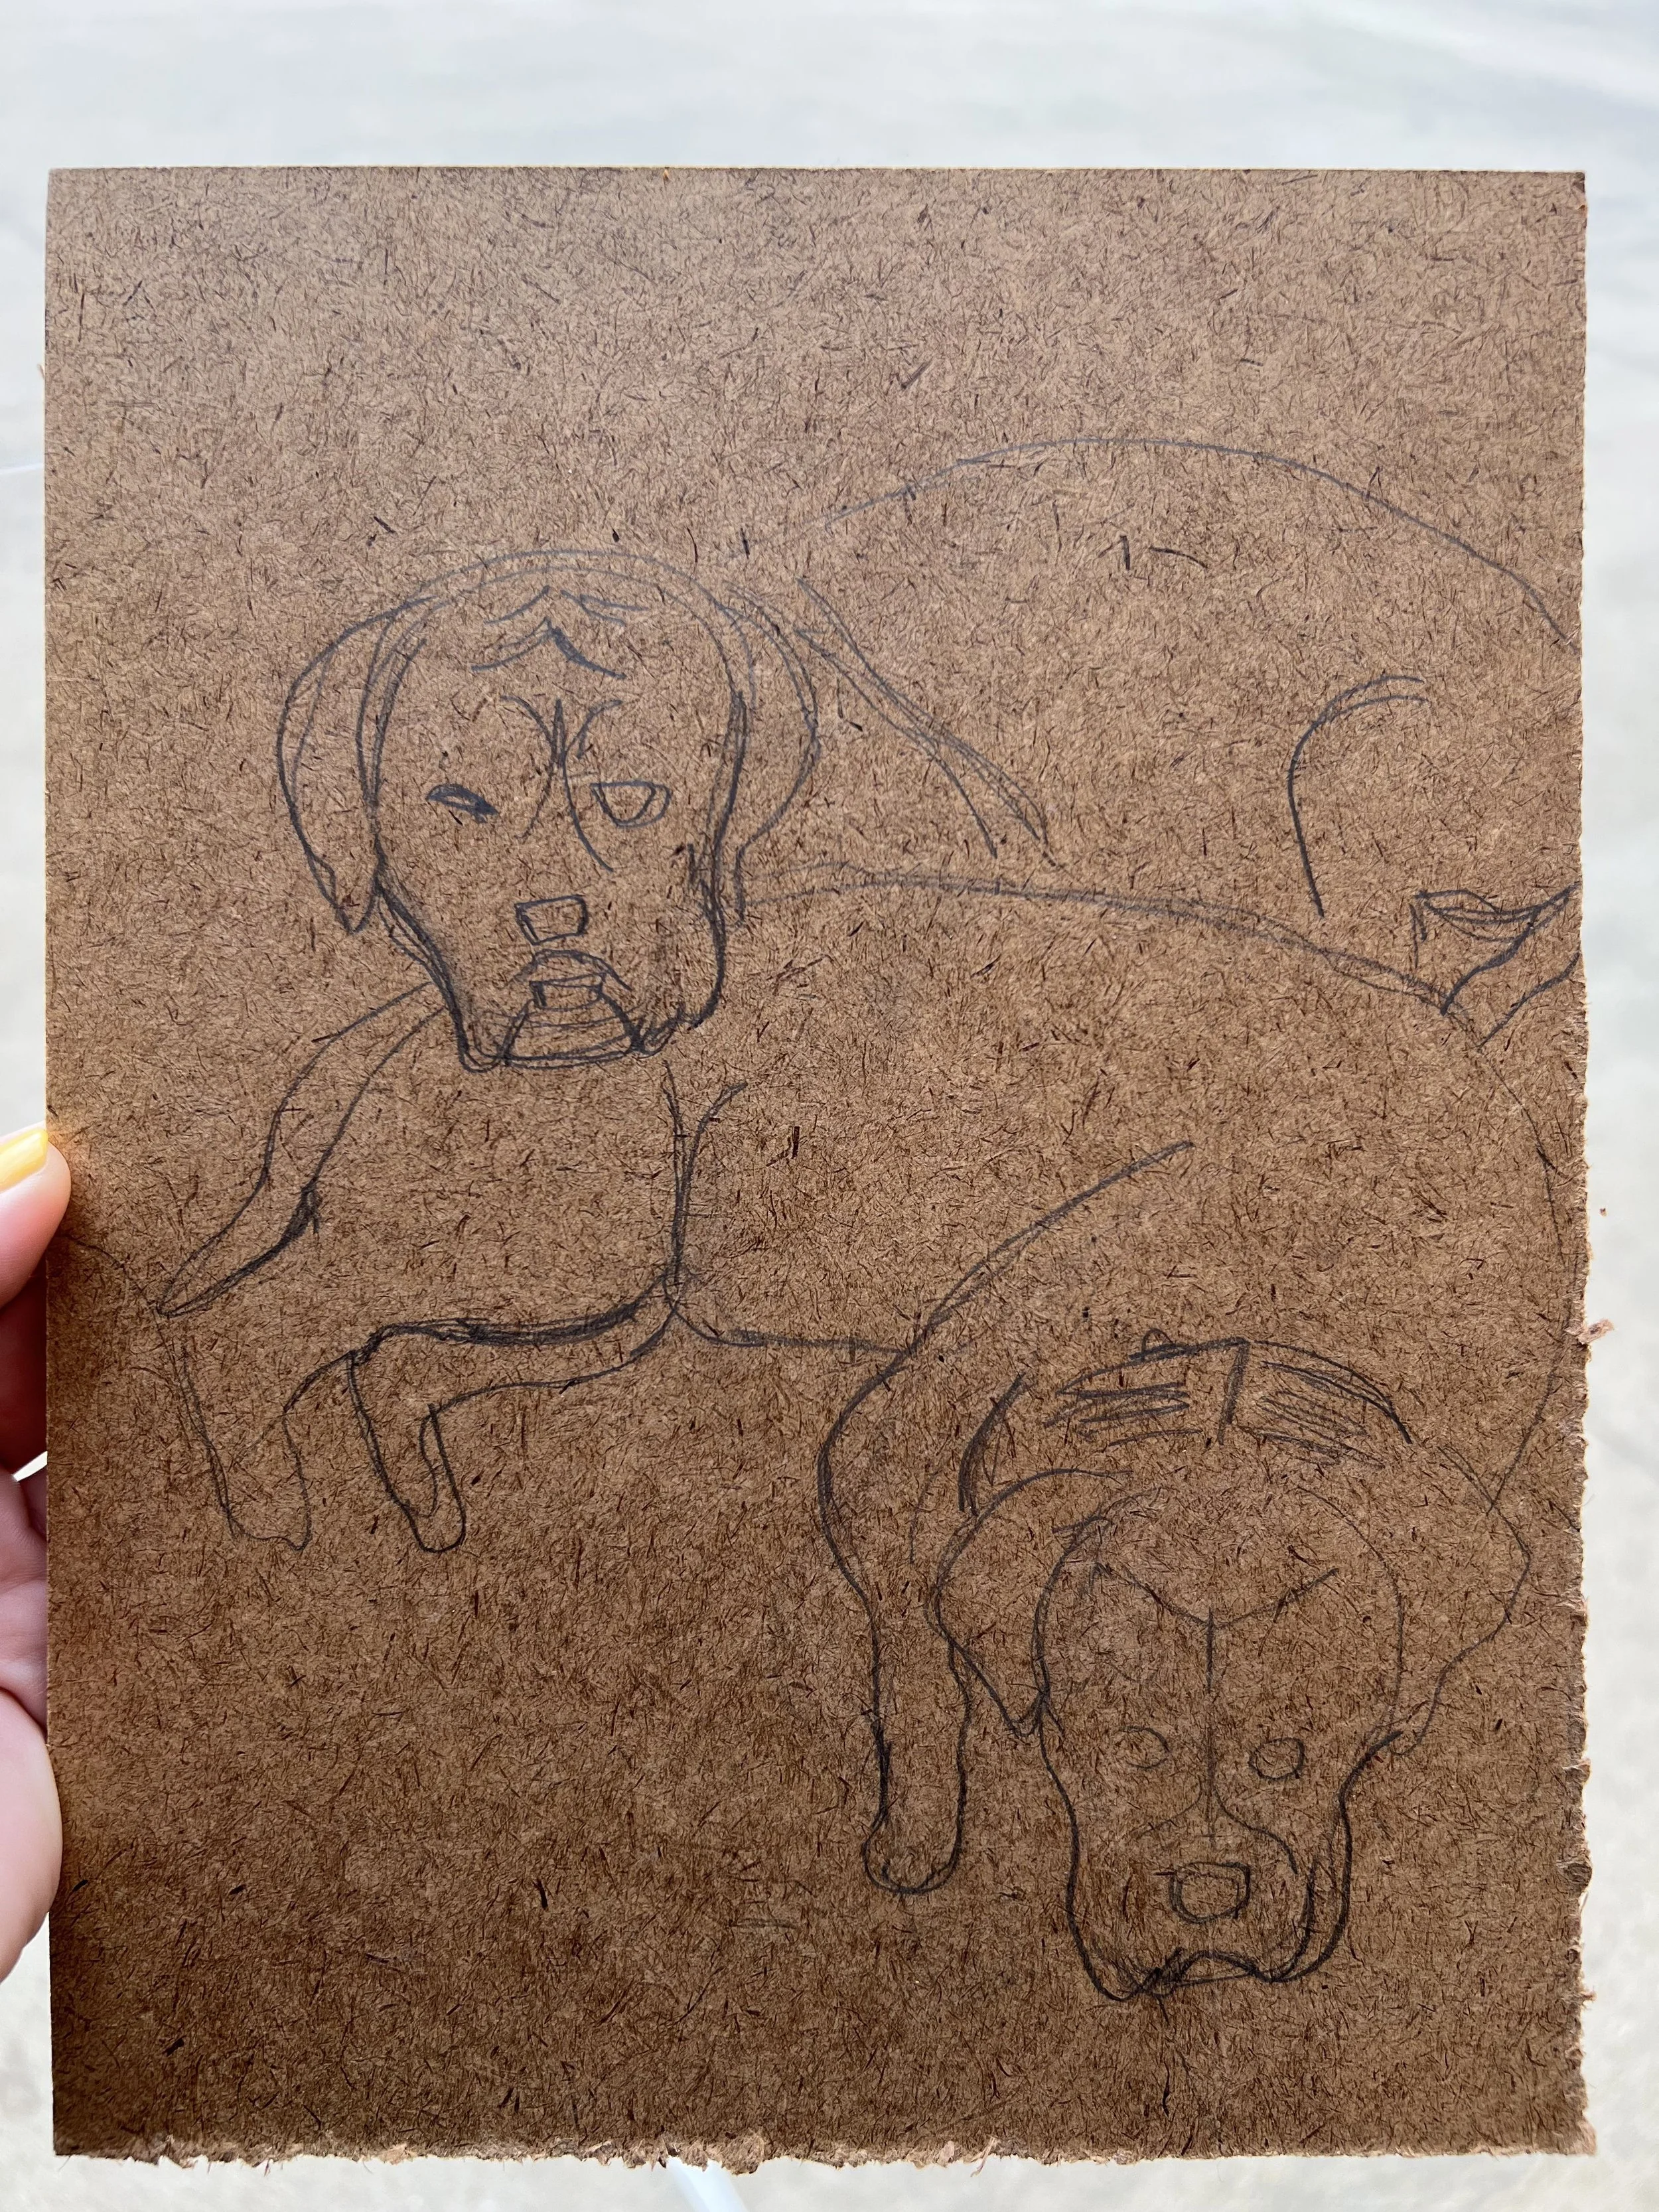
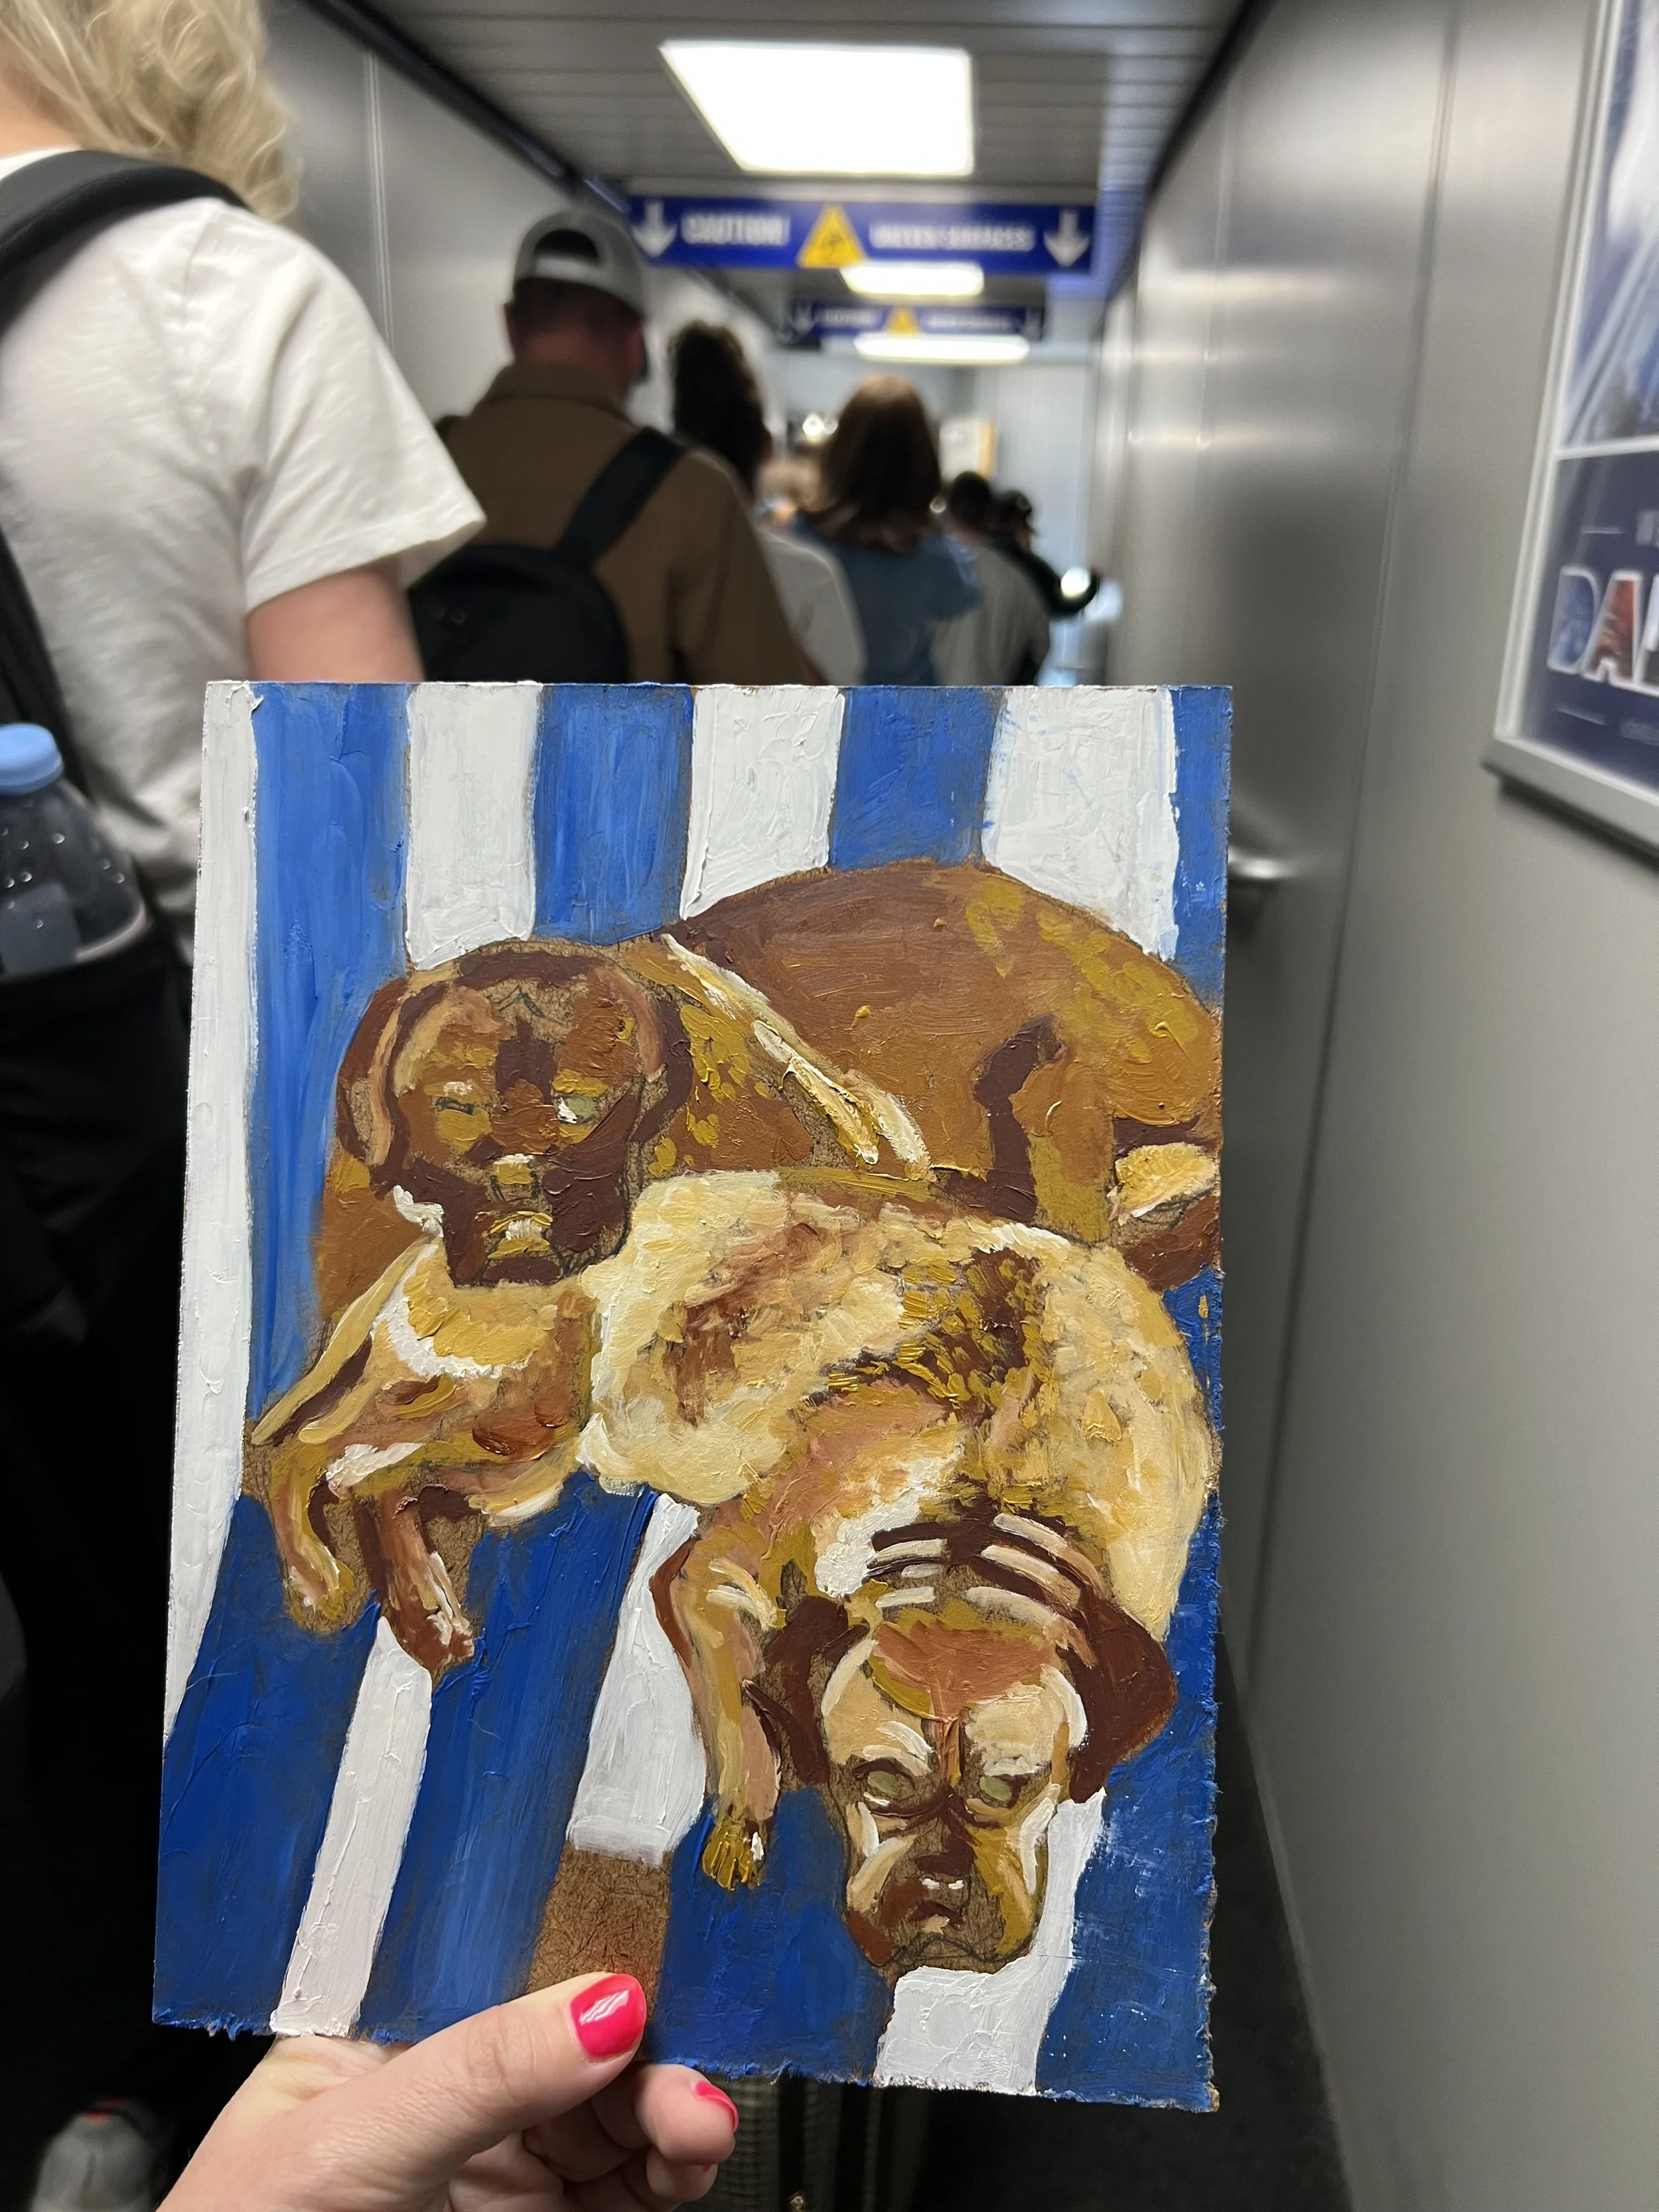
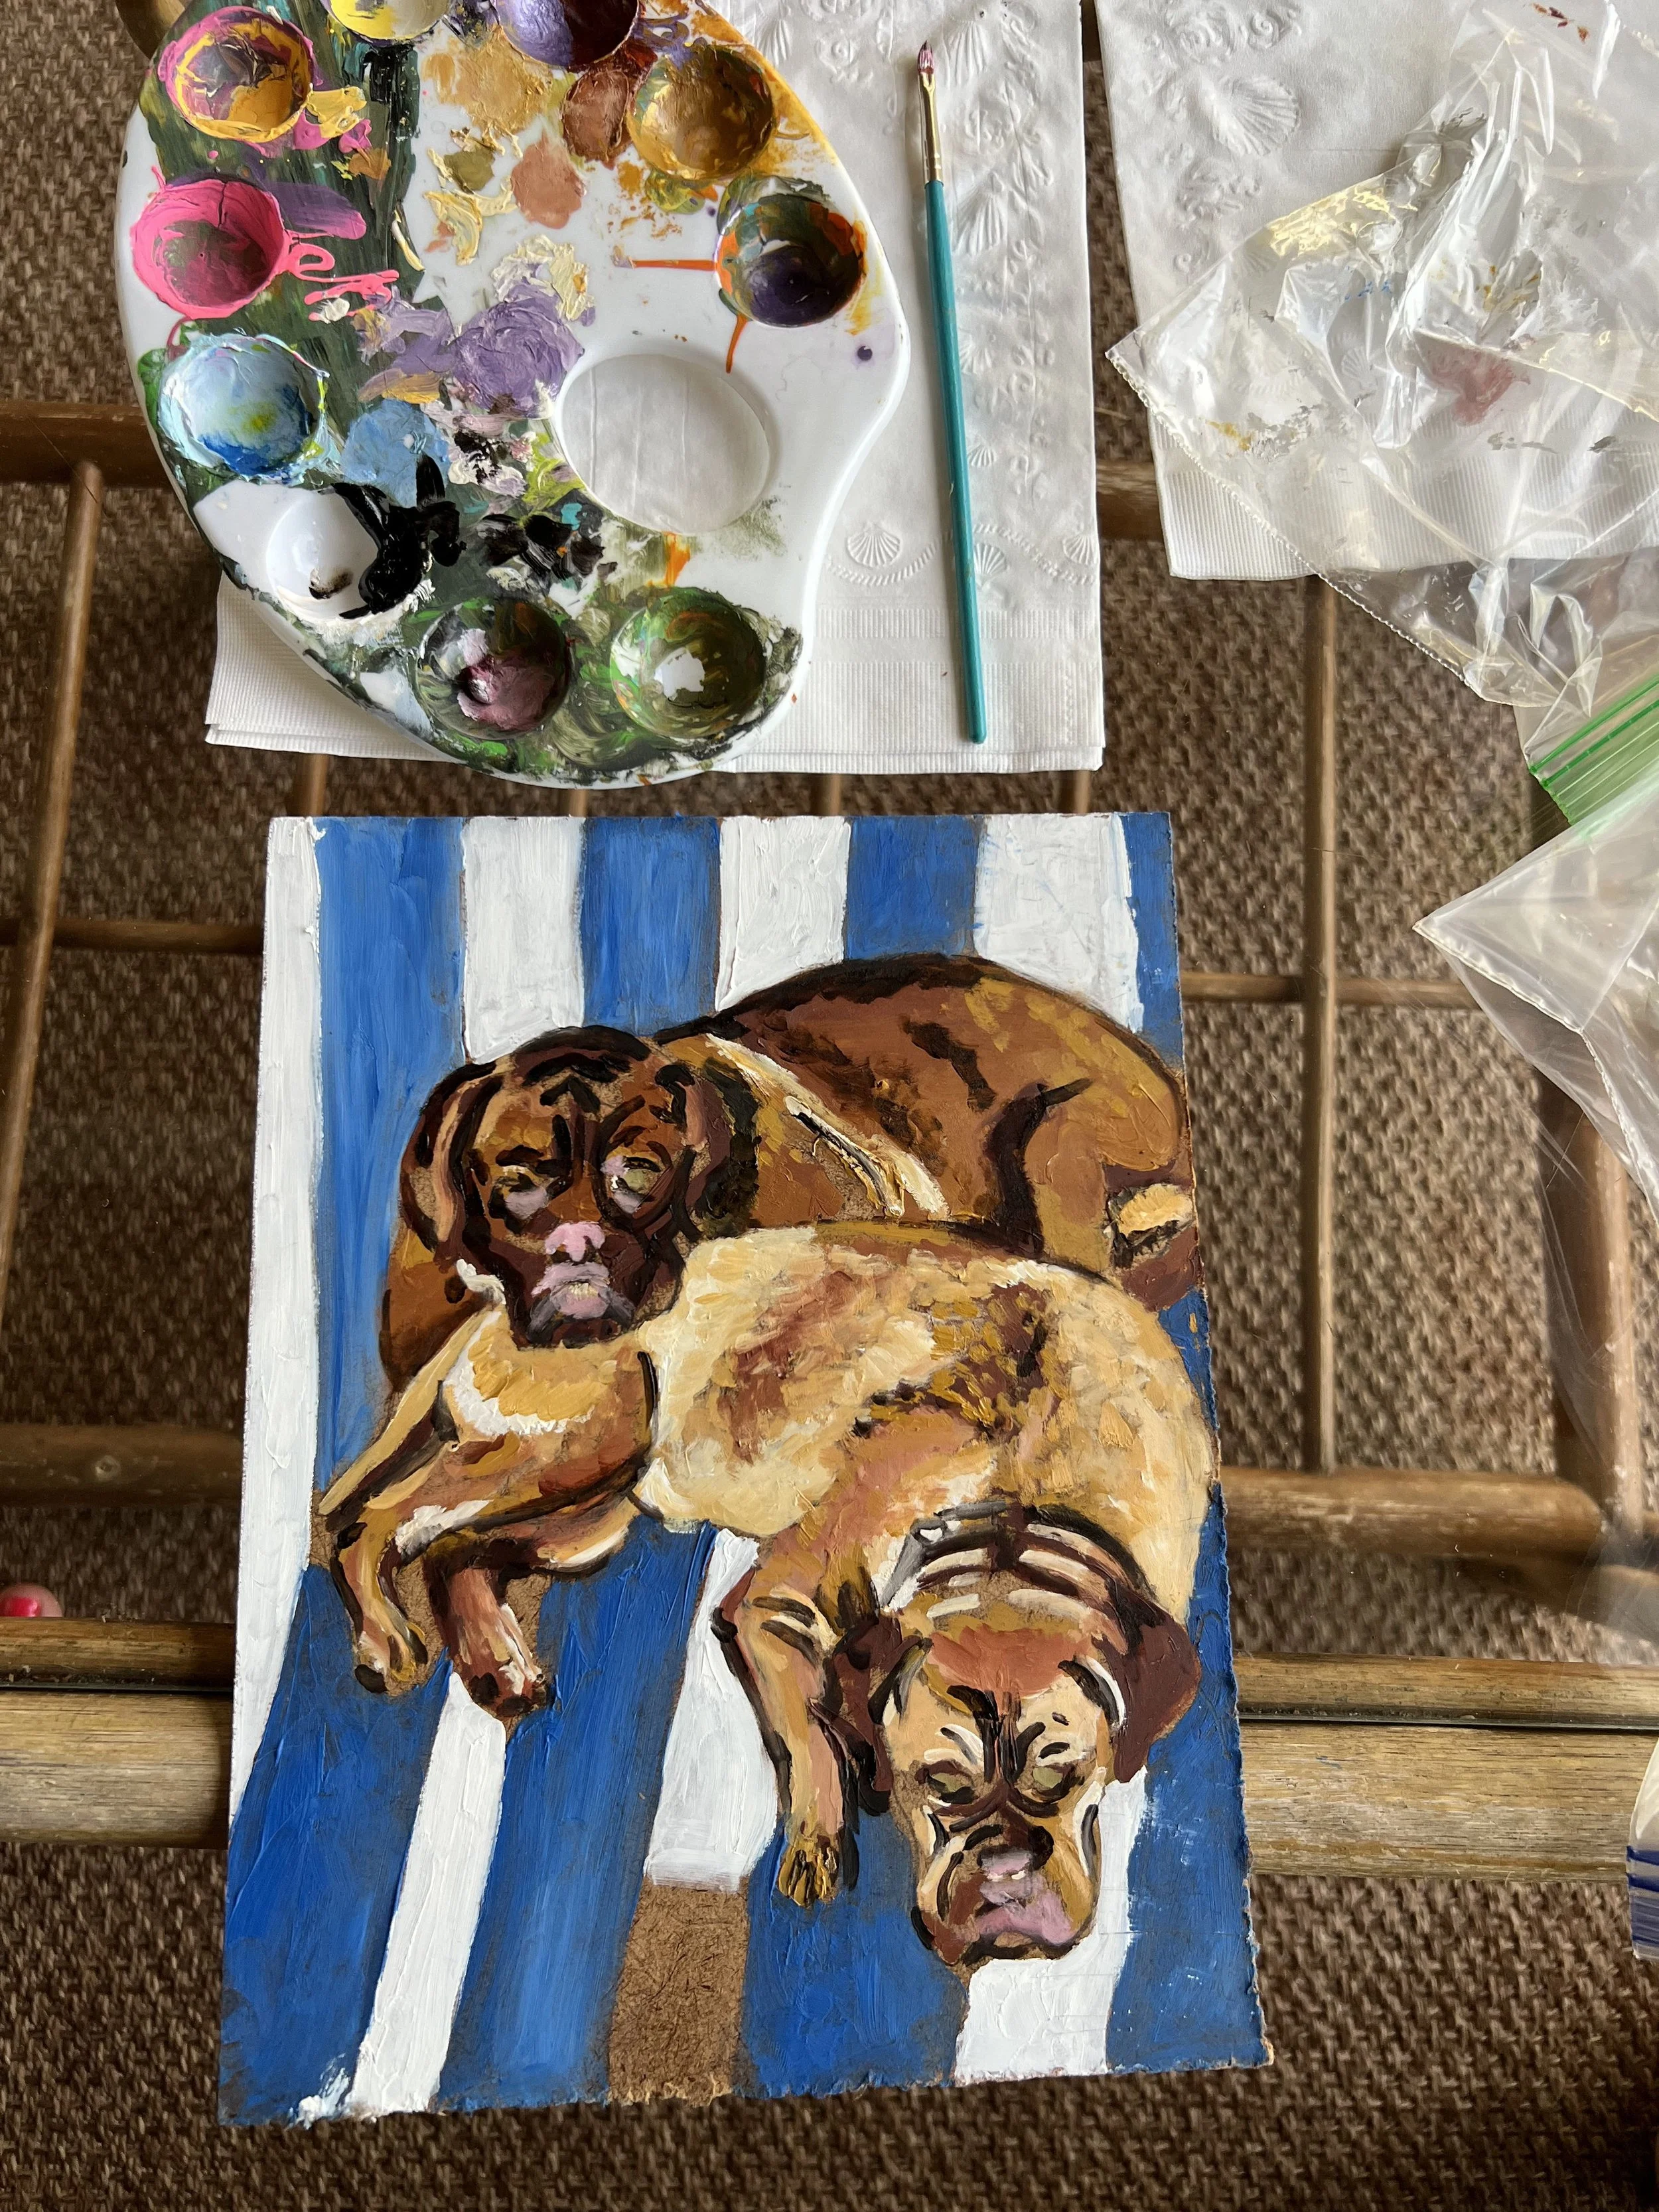
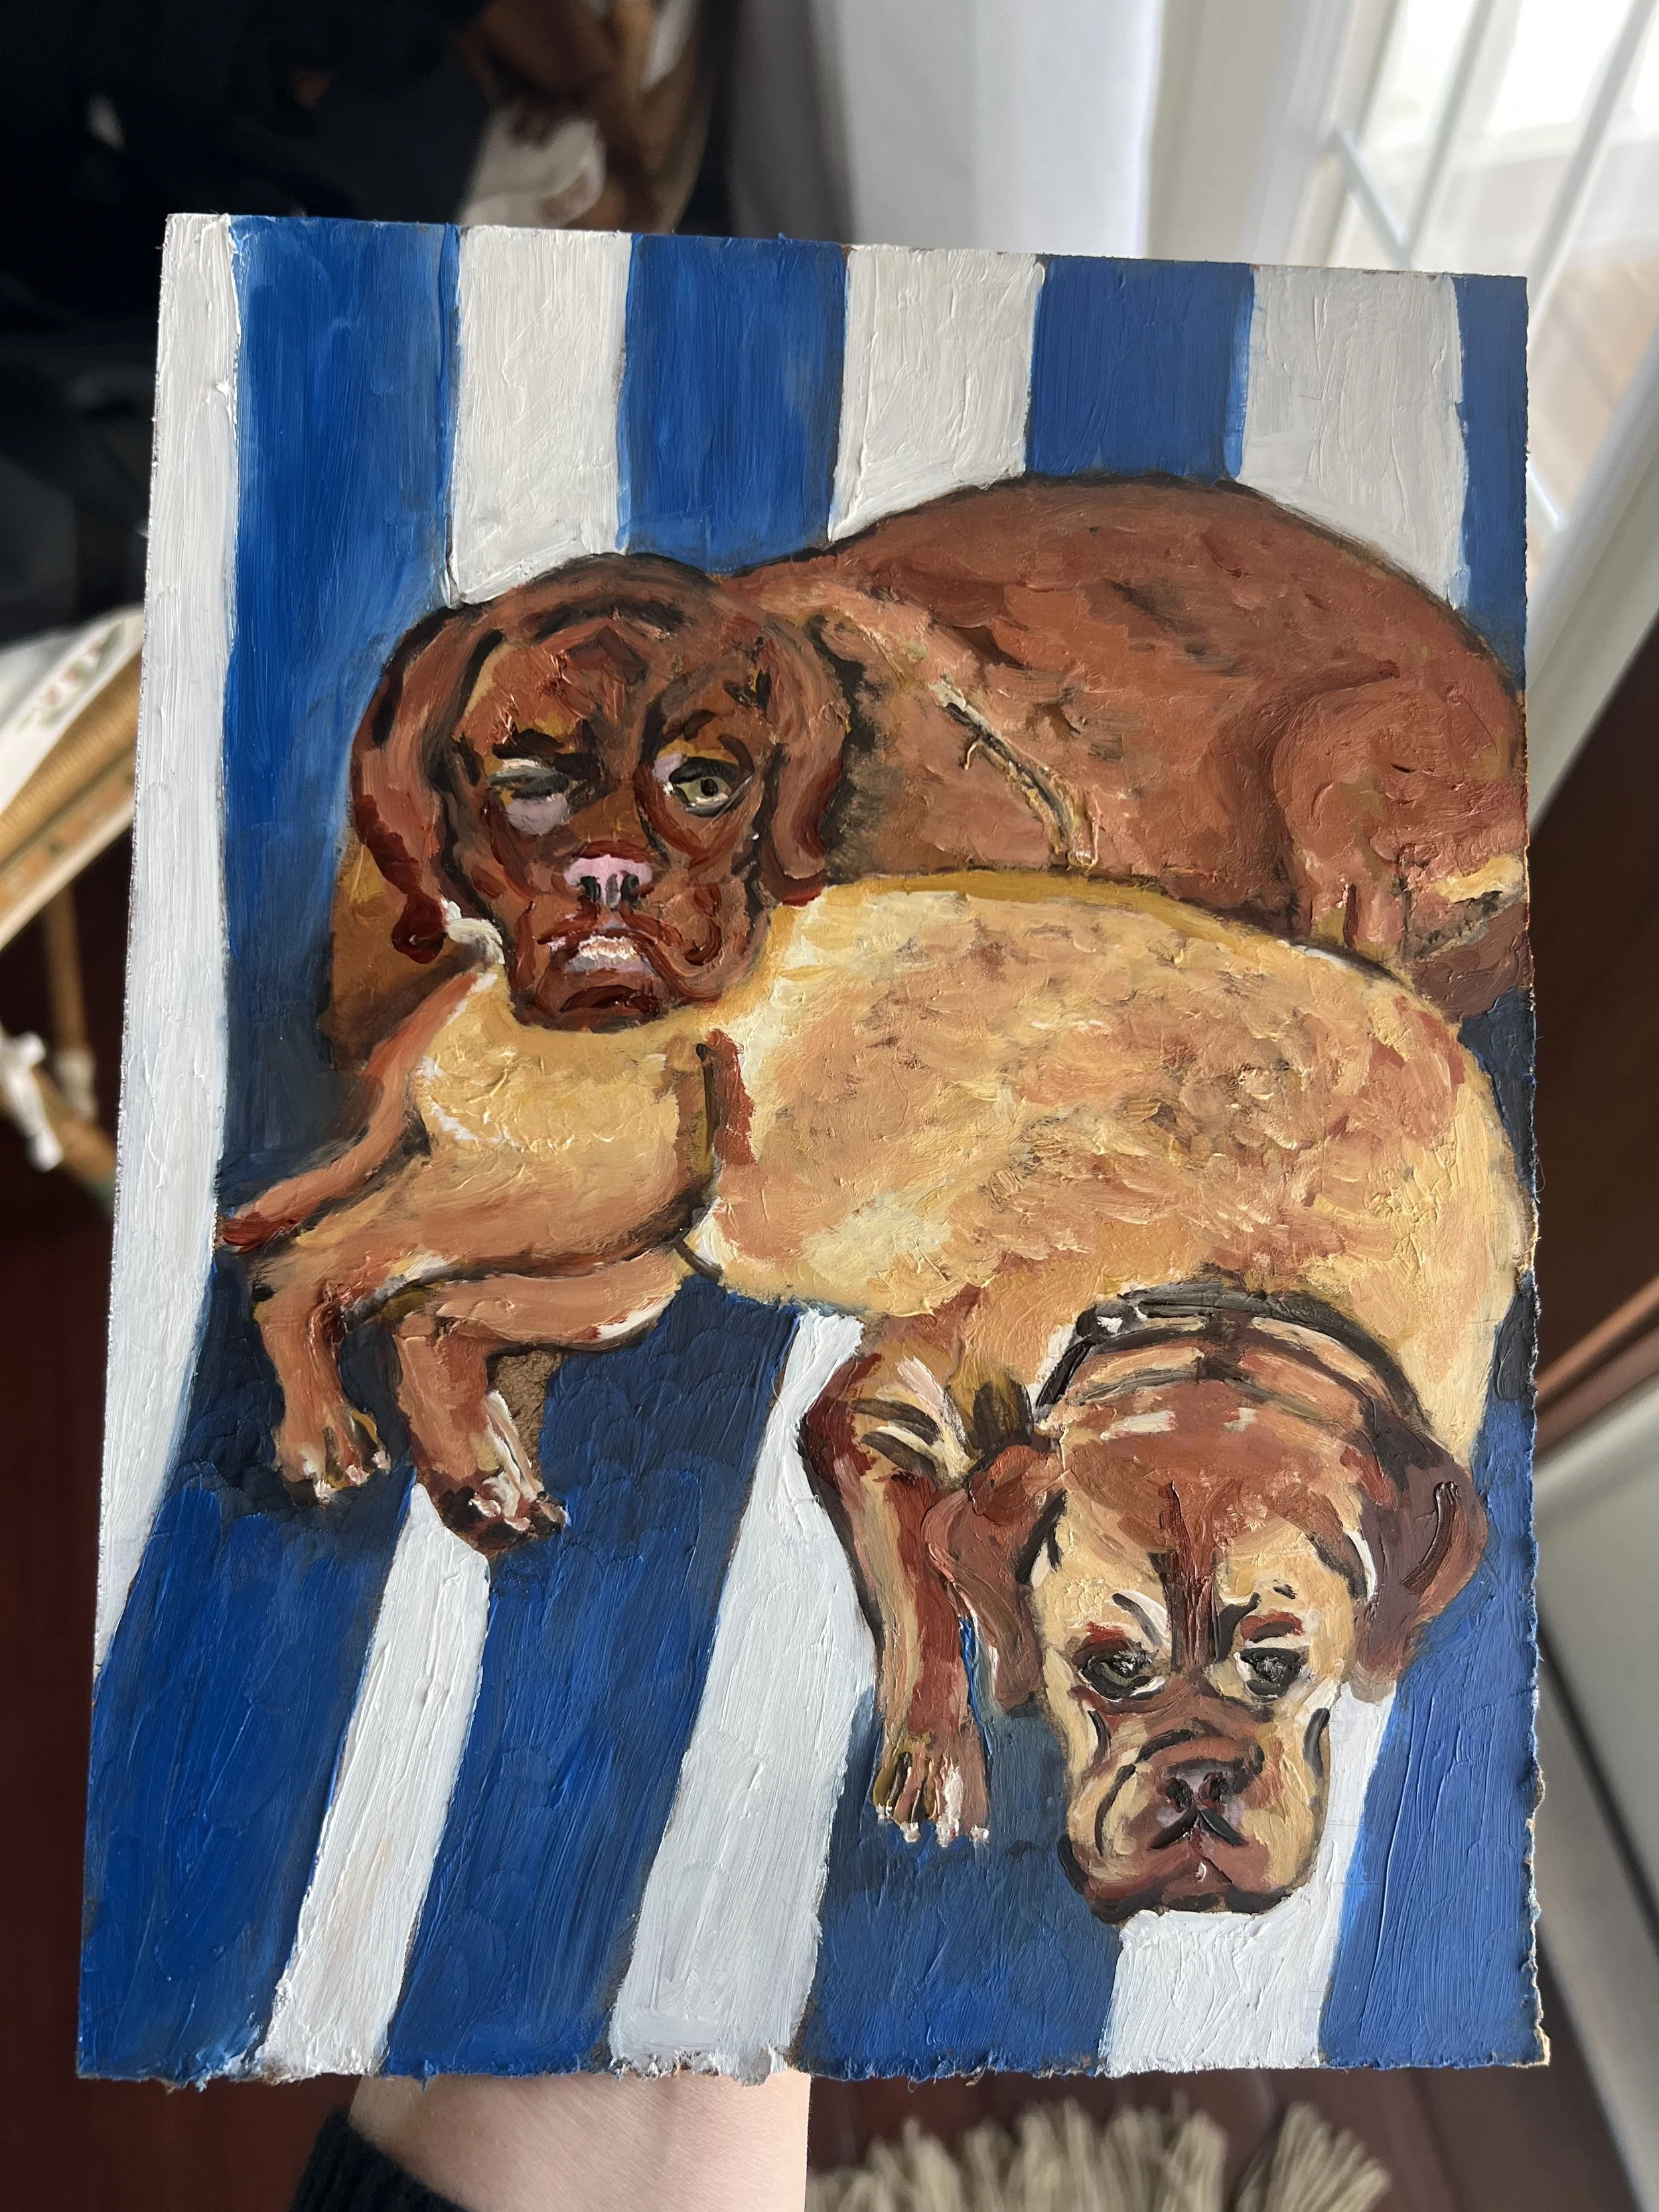
My gift for March was very special and something I so enjoyed working on. One of my great friends adopted two Mastifs two years ago and she is the best dog mom you have ever met. She loves these pups so much and I knew that I wanted to paint a picture of them for her birthday. I asked her husband to send me a photo of the dogs and then I thought through the logistics so I could decide on size, what paint to use and how I planned to get it to her. My husband and I fly to Florida each April to celebrate my husbands birthday and we always meet up with this couple. I knew that this was my opportunity to give her this painting in person so the count down was on. Since I had to fly with the painting I decided to paint on an 8×10 inch hardboard so it was small enough I could carry it on. I started the painting a couple weeks before we left, and I used water water mixable oil paints. I love painting with these because it still gives you the mix-ability that oil paints provide, but they dry faster and its easier to clean off your brushes. I love that I have challenged myself to intentionally be creative each month, but I must admit that being a mom to two busy 6 years olds and working full time leaves me with limited hours to work on these fun projects. So although my intention was to have this painting complete and dried before we left, that simply was not the case. What can I say guys I’m doing my best hehe. It was wet when I transported it on the plane, I painted on it while we were on vacation and I gave it to her wet on the day we were headed home. The painting was a little more rushed then I would have liked and if I’m being honest it’s not my best work, but thats not what this challenge is about. It’s about being intentional, thinking about how much the people in your life mean to you, and coming up with a creative gift that someone will love. It’s much less about the craft and much more about the thought behind the craft. I can tell you that being able to hand her this gift in person and seeing the joy it brought her was absolutely priceless and worth every second I spent on painting it. If you are looking to learn how to paint pets specifically I plan to create a course dedicated to just that. Once I have it up in my shop I will link it here!
Happy Crafting!!!
My Challenge to you:
Who in your life could you make something creative for?
What does that person love?
What could you make for them that would be very special?